
Assembly Instructions


16/01/2019 Shapeoko Assembly Guide - Carbide 3D
https://docs.carbide3d.com/assembly/shapeoko/s3/ 28/35
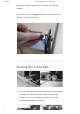
Install Y-Axis
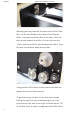
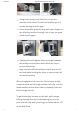
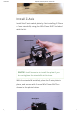
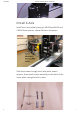
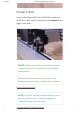
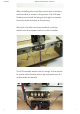
Using 2 M5x35mm BHCS and 2 M5x25mm Spacers,
install the Y-axis switch and plate to the outside of the
Right Y-axis plate.
PROTIP: Before you can use the homing feature,
homing will need to be enabled in the software
conguration.
After assembly is complete, head over to the
Enable Homing Article to congure your software.
Enable Homing Article
NOTE: If you are having problems with your limit
switches, please refer to the Homing Switch
Troubleshooting article for help
Homing Switch Troubleshooting