
Assembly Instructions


16/01/2019 Shapeoko Assembly Guide - Carbide 3D
https://docs.carbide3d.com/assembly/shapeoko/s3/ 27/35
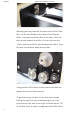
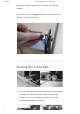
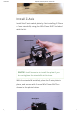
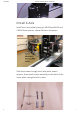
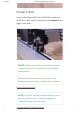
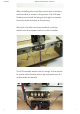
Install X-Axis
Install the X-axis plate by using 2 M5x35mm BHCS and
2 M5x25mm spacers, shown below in the photo.
Slide the screws through the X-axis plate, attach
spacers, then attach entire assembly to the back of the
X-axis plate, using the built in nuts.