
Assembly Instructions


16/01/2019 Shapeoko Assembly Guide - Carbide 3D
https://docs.carbide3d.com/assembly/shapeoko/s3/ 25/35
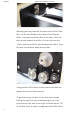
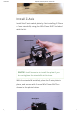
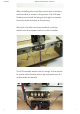
This should be just close enough where the M5x10mm
screw can catch a thread into the belt clip nut (as
shown above, left image). Once the screw is engaged
with the nut, tighten the clip with a 4mm allen key.
WARNING: DO NOT OVER-TIGHTEN THE BELT. OVER
TIGHTENING THE BELT CAN BEND THE STEPPER
MOTOR SHAFT!
Home Switches
There is 1 home switch per axis of your machine (3
total). Install in the order shown below.
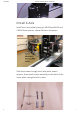
Assemble the Switch Plates
Note the cables are color coded for easier assembly.
The red/black cables go on the X and Z-axis, and the
longer brown cable goes on the Y-axis.
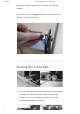
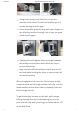
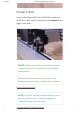
It is easiest if you install the switches onto the switch
plates prior to installing the switch plates onto the
machine. Install each switch as shown in the photo
below.