
Assembly Instructions


16/01/2019 Shapeoko Assembly Guide - Carbide 3D
https://docs.carbide3d.com/assembly/shapeoko/s3/ 20/35
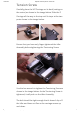
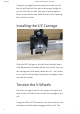
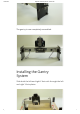
After the front is nished, move around to the back of
the machine and install all 4 screws on each side of the
gantry. Again, these screws should not be fully
tightened. We will do that in the ‘squaring your
machine’ section.
Moving back to the front of the machine, install the
remaining 2 screws on each side of the End Plate.
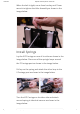
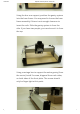
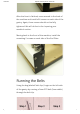
Running the Belts
Using the bag labeled ‘belt clips’, begin on the left side
of the gantry by running a 9mm GT2 belt (9mm width)
through the belt clip.