
Assembly Instructions


16/01/2019 Shapeoko Assembly Guide - Carbide 3D
https://docs.carbide3d.com/assembly/shapeoko/s3/ 16/35
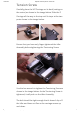
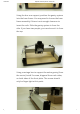
Using the carriage boxes as supports at each end of
the rail will help hold the rail at the proper height for
you to install the screws. You don’t need to tighten
these screws all the way. We’ll do that in the ‘squaring
the machine’ section.
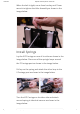
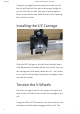
Installing the X/Z Carriage
Slide the X/Z Carriage on the rail from the right hand
side. Because the V-wheels will be as loose as they can,
the carriage will slide easily down the rail — be careful
not to tip the rail too high causing the carriage to slam
into the left Y plate.
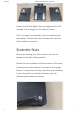
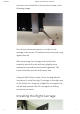
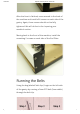
Tension the V-Wheels
Once the carriage is on the rail, support the right end
with another 9x7x4 box and center the carriage on the
rail.
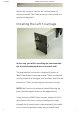
Using the M8 (or 5/16”) wrench, turn the eccentric nuts
clockwise until the wheels engage with the rail. The