
Assembly Instructions


16/01/2019 Shapeoko Assembly Guide - Carbide 3D
https://docs.carbide3d.com/assembly/shapeoko/s3/ 14/35
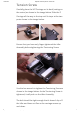
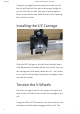
Open the Left and Right Y-Axis carriages and the X/Z
carriage. Set carriages on the table as shown.
The 3 carriages are shipped to you as complete sub-
assemblies. Thread locker has already been used on
all threaded connections.
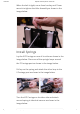
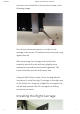
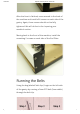
Eccentric Nuts
Before proceeding, turn the eccentric nuts so the
wheels are at their widest position.
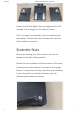
Rotate the nut clockwise until the screw is at the most
bottom point of the rotation. as shown in the image
below. It is important to only rotate the nuts clockwise.
If you rotate the nut counter-clockwise you risk
loosening the bolted connection.