
Owner's manual


Table Of Contents
- Revision and Copyright Information
- Limited Warranty
- Assistance
- Table of Contents
- 1. Preparation and Siting
- 2. Hardware Installation
- 2.1 Base Foundation
- 2.2 Tower/Pole
- 2.3 Enclosure
- 2.4 Crossarm and Sensor Installation
- 2.5 Communication Peripherals
- 2.6 Lightning Rod Installation
- 2.7 Solar Panel Installation
- 2.8 Battery Installation
- 2.9 Restraining Cables and Sealing/Desiccating Enclosure
- 3. ET Software
- 4. Maintenance, Troubleshooting, and Schematics
- 4.1 Maintenance
- 4.2 Troubleshooting
- 4.2.1 No Response Using the CR1000KD Keypad
- 4.2.2 No Response from Datalogger through SC32B, RAD Modem, or Phone Modem
- 4.2.3 NAN or (INF Displayed in a Variable
- 4.2.4 Unreasonable Results Displayed in a Variable
- 4.2.5 NAN or (INF Stored in a Data Table
- 4.2.6 Communication Problems when using an RF450 Radio
- 4.2.7 Gill WindSonic1-ET Diagnostic Diagnostic Codes
- 4.3 Schematics of Connectors
- Appendix A. T107 Maintenance Log
- Appendix B. PS24 24 Ahr Power Supply and 10 x 12 inch Enclosure
- Appendix C. Exploded Views
- Appendix D. Default Programs
- Appendix E. Step-down Transformer Installation
- Campbell Scientific Companies
T107 Weather Station
filter in the cup of water. Remove the filter and allow to air dry before
putting it back on the end of the sensor.
6 months
• Replace 034B-ET’s anemometer bearings and reed switch if operating
under harsh conditions, such as constant high winds, blowing dust, and/or
salt spray contamination.
1 year
• Replace 034B-ET wind speed (anemometer) bearings (pn 3648). Contact
your local Toro distributor for service.
• Replace 034B-ET wind speed (anemometer) reed switch (pn 13764) if
needed. Contact your local Toro distributor for service.
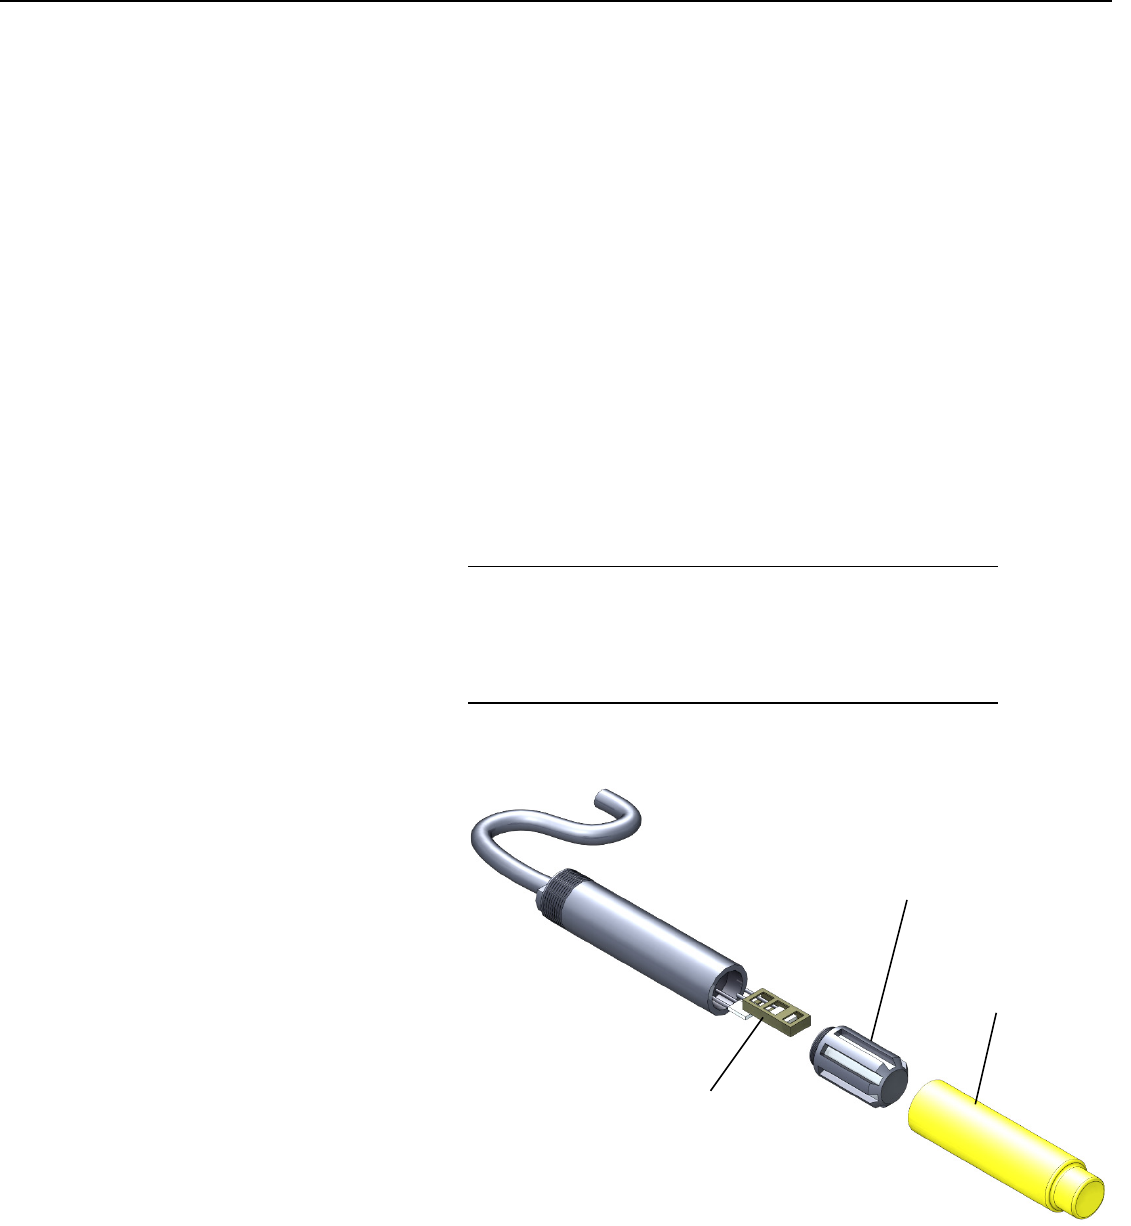
• Check calibration of the HMP60-ETS temp/RH probe. Sensor will tend to
drift up over time giving readings higher than 100%. Replace RH chip (pn
9598) if necessary (see FIGURE 4-1 and Section 4.1.4.1, Procedure for
Removing RH Chip).
T107 stations began shipping January 2014 with an updated gill
radiation shield retained with knurled thumb screws, using the
HMP60-ETS Temp/RH sensor. All information in this document
is also pertinent for the HMP50-ET, HMP60-ET, and HMP60-
ETR sensors.
• Replace desiccant in enclosure housing as needed.
FIGURE 4-1. Exploded view of the temperature and RH sensor
(adapter not shown)
NOTE
Protective Cap
and Filter
Shipping Cap
(remove prior
to installation)
9598 RH Chip
57