
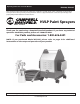
Operating instructions


8
Operating Instructions and Parts Manual
HVLP Paint Sprayers
to side (See Figure 3). Move the spray
gun across your work from end to end.
Be sure to maintain the same speed of
movement. This will ensure an even
application of coating. Always release
the trigger at the end of a pass.
Continue spraying in the opposite
direction overlapping your previous
coat by 1/3 to 1/2. When finished, you
should have an even wet coat on your
work. If you have dry spots, you have
overlapped too widely.
If you have heavy or wet spots, you
have overlapped too much. When
spraying a large or pre-assembled
piece, start at the top and work down.
Try to spray the hard-to-reach surfaces
first. Keep in mind that a light, wet
film will generally produce better
results than a heavy, wet coat. When
spraying a vertical surface, apply a
thin“tack” coat first, followed by a
normal light wet coat. This technique
will help prevent “runs” and “sags.”
When using your Spray Gun you
control five variables.
1. Fluid flow
2. Distance of the spray gun from your
work. (4"–8" is average. Closer if
necessary.)
3. Pattern Direction (vertical fan,
horizontal fan and round)
4. Speed of application
5. Fan pattern control (adjust air cap
ring)
NOTE: Items 1, 2, and 4 directly relate
to each other.
RUNNING MULTIPLE SPRAY GUNS
WITH A TURBINE
It is possible to run the 4-stage turbine
system with two spray guns at the
same time by installing “Y” Connector
to the turbine outlet port.
www.chpower.com
HV2100, HV2105
IMPORTANT: If the “Y” connector is
installed and only one spray gun
operated, the 2nd outlet must be
capped or closed so that performance
to the single spray gun will not be
affected.
Operation (Cont.)
USING PRESSURE POTS WITH
TURBINE SYSTEMS (HV2105)
When using a remote cup or pressure
pot, it is necessary to introduce
compressed air in order to pressurize
the remote pot and move the fluid
from the pot to the tip/nozzle of the
spray gun. In general, 5 pounds of
pressure is sufficient for most average
viscosity fluids in order to deliver the
proper flow of fluid to the tip. Higher
pressure would only be necessary for a
heavier viscosity fluid.
A good test to determine the correct
fluid delivery is as follows:
1. Pressurize the pot. DO NOT turn on
the turbine.
2. Pull spray gun trigger until a stream
of fluid flows from the tip/nozzle.
3. Adjust the pressure until the fluid
drops off or bends at approximately
2-1/2 inches (6.35 cm). Pot pressure
should be correct at this point.
!
WARNING
Always depressurize the remote pot
using the safety valve when the
equipment will be idle for a while. This
will prevent excess fluid from
remaining in the fluid hose, and
prevent a possible accident should the
trigger be pulled and paint streams
from the spray gun.
Always ensure that the remote cup is
tightly sealed, and all gaskets are in
good shape, to prevent air and fluid
leaks.
Be sure to flush and clean fluid hose at
the end of a work session.
For smaller jobs, insert a one gallon can
inside the 2.5 gallon pressure pot. This
will keep the inside of the pot clean.
USING OPTIONAL ACCESSORIES
WITH SPRAY GUN
OPTION 1: In parts diagram on page
14, locate Item No. 13. Most turbine
spray guns are fitted with this blanking
cap. You can remove the cap and install
Item Nos. 14A and 14B. This gives you
the option to attach your air hose onto
this port instead of into the handle. To
install, unscrew blanking cap. Screw in
Item No. 14A and 14B. To use this port,
unscrew the male hose coupler and
screw onto Item No. 14A. Take the
small blanking cap (Item No. 14B) and
screw it onto the threads at the
bottom of the handle. Reverse these
two fittings to use the air hose coupled
to the handle.
OPTION 2: This will allow you to
control the air flow and create
textured or splatter paint effects. To
install, remove blanking plug (Item No.
13) or Item Nos. 14A and 14B. Screw
Item No. 13A into the spray gun. After
installing the air control/texturing
device, turn the adjusting screw as far
as you can counter clockwise (open).
Always use in the full open position
unless it is necessary to reduce the flow
of air, or to create a textured or
splatter effect.
Additional
Instructions for Model
HV2105
UNPACKING
Remove contents of shipping box and
lay out all of the pieces. You will find
the cart base, handle, 2.643 gallon
(10L) pressure pot (with regulator,