
User Manual

Web Page Reference
96
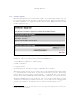
The software image will now be uploaded to the unit. This upload should only take a few seconds.
Once complete the image is verified and validated to ensure that no errors occurred during transfer
and that the image is valid to run on the current platform. If there are any problems a warning
screen will appear.
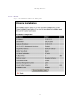
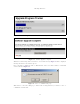
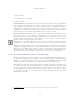
The unit being upgraded will now display information about the build it currently has stored in
the image bank and the one that’s just been uploaded. If the image is not the right one, the user
has the option to go back and reload a new image. (See Figure 55)
Figure 55 Software Upgrade Image Check
The user should ensure that the correct image is shown before pressing the “Program Software
Image into Non-Volatile Memory” button. Once this button has been pressed the image is stored
into non-volatile memory, this process can take up to 60 seconds and must not be interrupted.
If the upgrade process is interrupted during the erasure of the image bank, or during the repro-
gramming of the image bank, the image bank will be left in a corrupt state. If this occurs the
software must be reloaded. All software images that are stored in non-volatile memory are pro-
tected via the use of CRCs. If the software detects an invalid CRC the image bank is marked as
‘corrupt’ and the 500 Series bridge boot code will boot the fixed software image. If this occurs the
user must attempt to reload the correct version of software.
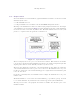
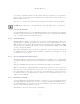
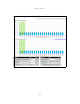
During the write process the progress of the upgrade is displayed on the progress tracking page
(Figure 56). The upgrade process should not be interrupted. Interruption of this process can
result in a corrupt main software image, which will result in the recovery image been booted at
the next reset cycle.