
User's Manual

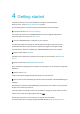
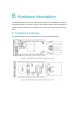
4 Getting started
Complete a few steps to set up the hardware and install the required software.
Before you start, check Minimum requirements on page 4.
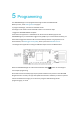
Connect the Dongle to a computer and get started with nRF Connect for Desktop.
1. Download and install nRF Connect for Desktop.
This includes the driver for the nRF52840 USB Device Firmware Upgrade (DFU) feature.
Fordocumentation on the tool, see nRF Connect.
2. Insert the nRF52840 Dongle in a USB port on your computer.
The status light (LD2) starts pulsing red, indicating that the Dongle is powered up and is in
bootloadermode. After a few seconds, the computer will recognize the Dongle as a USB
composite device. Thedriver needed for the nRF52840 USB DFU feature is also installed.
3. Optional: Download the nRF5 SDK.
nRF5 SDK contains application examples for the Dongle. For documentation, see nRF5 SDK
v15.2.0.
4. Optional: Download SEGGER Embedded Studio (SES).
SES is needed for building application examples for the Dongle. It can be used free of charge with
nRFdevices.
5. Optional: Install nrfutil.
nrfutil can be used for programming the Dongle from the command line.
6. Open an nRF Connect for Desktop app and select the serial number of the nRF52840 Dongle as
thetarget.
Applications that support the nRF52840 Dongle will display the serial numbers of any connected
Dongles in the device drop-down list.
If the app supports the Dongle but the correct firmware is missing, you will be asked to confirm
thatyou want to have the Dongle programmed. Click OK.
If the Dongle contains the correct firmware, the app will start immediately.
For further information on programming the nRF52840 Dongle, see Nordic Developer Zone.