
User's Manual
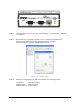

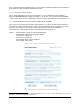
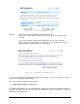
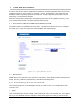
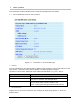

Table Of Contents
- 1 VIPER OVERVIEW
- 2 SYSTEM ARCHITECTURE AND NETWORK PLANNING
- 3 DATARADIO VIPER QUICK START
- 4 VIPER WEB MANAGEMENT
- 5 UNIT STATUS
- 6 SETUP (BASIC)
- 7 SETUP (ADVANCED)
- 7.1 RF OPTIMIZATIONS
- 7.2 IP SERVICES
- 7.3 IP ADDRESSING
- 7.4 IP OPTIMIZATION
- 7.5 IP ROUTING (TABLE/ENTRIES)
- 7.6 TIME SOURCE
- 7.7 ALARM REPORTING
- 7.8 USER SETTINGS
- 8 SECURITY
- 9 STATISTICS
- 10 MAINTENANCE
- 11 NEIGHBOR MANAGEMENT
- 12 NETWORK OPTIMIZATION
- 13 UPGRADING YOUR FIRMWARE
- VIPER SPECIFICATIONS
- PRODUCT WARRANTY
- DEFINITIONS

On your Internet browser address line, type the factory-default IP address: 192.168.205.1.
Press Enter to open the Network Password screen.
3.5.1 Initial Installation Login
For an initial installation, enter any User Name of 1 to 15 characters and the default
Password ADMINISTRATOR (upper case letters). Click OK. The web interface WELCOME
screen opens. Once setup is completed, change the Viper login password (See Section 8.1).
3.6 CONFIGURE YOUR VIPER USING THE SETUP WIZARD
Viper units are programmed using the web interface. Log into the Viper web interface as
described in Initial Installation Login. Follow the instructions below to configure the Viper
using the setup wizard. All units are factory programmed with an IP address of
192.168.205.1. Repeat these steps to program additional Viper units.
STEP 1: Station Name: Assign a unique Station Name
IP Forwarding Mode: Select Bridge (Mode)
Relay Point: Select No
Access Point: Select No
Multi-Speed Mode: Select Disabled
1
Click “Apply” Click “Next”
Figure 3.6 - Using the Setup Wizard: Step 1
1
This selection will be available for units configured to be rate-followers only. See section 5.1 for more
details on rate-followers and rate-controllers.
001-5008-000(Rev8) Page 33