
User's Manual
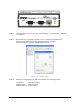

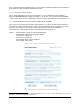
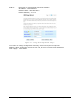
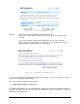
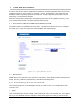
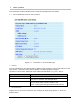

Table Of Contents
- 1 VIPER OVERVIEW
- 2 SYSTEM ARCHITECTURE AND NETWORK PLANNING
- 3 DATARADIO VIPER QUICK START
- 4 VIPER WEB MANAGEMENT
- 5 UNIT STATUS
- 6 SETUP (BASIC)
- 7 SETUP (ADVANCED)
- 7.1 RF OPTIMIZATIONS
- 7.2 IP SERVICES
- 7.3 IP ADDRESSING
- 7.4 IP OPTIMIZATION
- 7.5 IP ROUTING (TABLE/ENTRIES)
- 7.6 TIME SOURCE
- 7.7 ALARM REPORTING
- 7.8 USER SETTINGS
- 8 SECURITY
- 9 STATISTICS
- 10 MAINTENANCE
- 11 NEIGHBOR MANAGEMENT
- 12 NETWORK OPTIMIZATION
- 13 UPGRADING YOUR FIRMWARE
- VIPER SPECIFICATIONS
- PRODUCT WARRANTY
- DEFINITIONS

Figure 3.2 - Front Panel (Standard model shown)
STEP 1: From the Start menu on your PC, select Settings > Control Panel > Network
Connections
STEP 2: Right-click the Local Area Connection icon to open the Properties box.
Scroll through the list and select Internet Protocol (TCP/IP).
Click Properties to open the TCP/IP Properties box.
Figure 3.3 - PC LAN Setup
STEP 3: Select Use the Following IP Address and enter the following values:
IP Address: 192.168.205.254
Subnet Mask: 255.255.255.0
Default Gateway: (leave empty)
001-5008-000(Rev8) Page 31