
User Manual
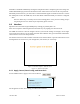
Table Of Contents
- 1.
- 1. Product Overview
- 2. Installation
- 3. Physical Description
- 4. Operation & Configuration
- 4.1 Browser-Based Setup and Status
- 4.2 LAN Setup
- 4.3 Login Screen
- 4.4 Interface
- 4.5 Setup Wizard (Bridge Mode)
- 4.6 Default IP Settings
- 4.7 IP Network Settings
- 4.8 Advanced IP Settings
- 5. Optimization & Troubleshooting
- 6. Specifications
120 40520-100a ViPR User Manual
28
After making an entry into a dialog box, click on Apply to temporarily apply the value(s) entered to the
relevant parameter(s). If not satisfied, click on Cancel button to restore to the value(s) present before a
change was made.
Note:
Cancel command only affects the dialog boxes or radio buttons in the opened window.
If needed, go to other Submenu(s) and make more entries. Click Apply before leaving each window.
When finished, click the Save Config button to make all changed entries permanent.
Use the Save Config command button before doing a Reset Unit otherwise temporarily entered parame-
ters would be lost.
Click on Save Config button:
• If there are changes to be saved, saving occurs automatically.
• If there are no changes to be saved, a sub-window prompts user to confirm saving.
Click on “Reset Unit” button:
• If there are changes to be saved, a sub-window prompts user to confirm resetting.
• If there are no changes to be saved, resetting occurs automatically.
A “Station Reset” 20-second timer counts down while the status reports: “Working…”
When done, the status reports: “Ready”