
User Manual

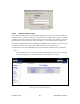
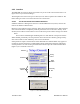
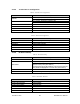
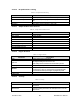
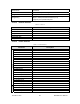
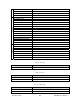
Table Of Contents
- Product Overview
- Installation
- Physical Description
- Operation & Configuration
- Local and Remote (OTA) Configuration
- Over-the-Air Firmware Upgrade
- Browser-Based Setup and Status
- LAN Setup
- Login Screen
- Interface
- Test & Save Parameters Buttons Behavior
- Unit Status
- Setup (General)
- Basic IP Configuration
- RF Setup
- Terminal Server Configuration
- Advanced IP Configuration
- RF Network Setup
- Broadcast / Multicast
- IP Optimization & Tuning
- Simple Network Time Protocol
- Hopper Network
- Security
- Network Statistics
- Packet Statistics
- Event Log
- RF Test
- FTP Transfer
- RSSI Table
- Manuals & Support
- Troubleshooting & Testing
- Specifications

192.168.204.1
Figure 8 - Enter Network Password screen
4.3.2.1 Initial Installation Login
For an initial installation, type in the User Name dialog box a string of any letters or numbers of
at least 1 and not exceeding 15 characters. Type in the Password dialog box a string of any letters
or numbers of at least 8 and not exceeding 15 characters. Do not place a check mark in the “Save
this password in your password list” box. Click OK to access to the Web Interface (Figure 9).
Dataradio recommends immediately changing
the HiPR-900 unit’s IP address as well as set your
own login password as part of the initial configuration (See 4.3.3.4 and 4.3.3.13).
For subsequent access to the HiPR-900 unit, use the User Name and Password you configured.
Note:
The User Name entry is currently not an access-limiting factor. It only serves to identify
the person gaining access. User Name may be required by future versions.
Figure 9 - Web User Interface (Preliminary)
120 40515-100a HiPR900 User Manual
22