
User Guide


Controlling the Display in PSpice Schematics
65
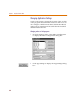
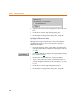
The Simulate Command frame shows the path that
PSpice Schematics uses to run MicroSim PSpice A/D.
3 To change the path name, type a new path name in the
Command text box.
4 Similarly, to change any of the other command lines,
click to select the command in the Other Commands
list box and type a new path name in the Command
text box.
5 Click OK to exit the App Settings dialog box.
6 In the Editor Configuration dialog box, click OK.
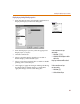
Changing the configuration file
A configuration file other than the default pspice.ini
file can be used for any of the programs that Schematics
interfaces with.
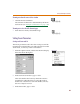
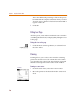
1 From the Options menu, select Editor Configuration
to display the Editor Configuration dialog box (shown
on 3-65
).
2 Click App Settings to display the App Settings dialog
box (shown on 3-65
).
3 In the Configuration File frame, select Other.
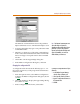
Note T
h
e Simu
l
ate Comman
d
f
rame wi
ll
show either PSpice or PSpice A/D,
depending on the package that you have
purchased. If you are using a network
licensed version that has both PSpice and
PSpice A/D available, you can choose
w
hich simulator you want to use.
T
o c
h
ange t
h
e con
f
iguration
f
i
l
e
f
or PSpice
Schematics:
1 In the Windows Program Manager,
select the PSpice Schematics icon.
2 Select Properties from the File menu.
3 Append -i<configuration file name> to
the Command Line.
4 Click OK.