
User Guide

Chapter 1 Getting Started
12
Drawing and Labeling Buses
Draw the bus labeled DB[1-12].
Drawing the bus
1 Click the Draw Bus button.
The pointer is now shaped like a pencil (as it was when
you were drawing wires).
2 Click where you want to start the bus.
3 Click the pointer where you want to end the bus.
4 Right-click to stop drawing buses.
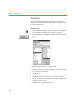
Labeling the bus
1 Double-click any segment of the bus to display the Set
Attribute Value dialog box.
2 Type DB[1-12] in the LABEL text box.
3 Click OK.
Connecting wires to the bus
1 From the Options menu, select Auto-Repeat to display
the Auto-Repeat dialog box.
a Set the Vertical Offset to 00.10.
b Ensure that Enable Auto-Repeat is enabled.
c Click OK.
2 Click the Draw Wire button and draw a wire from pin
2 of U5 to the bus.
3 Press M five times to place five more wires.
4 Click the Draw Wire button and draw a wire from pin
2 of U6 to the bus.
5 Press M five times to place five more wires.
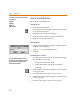
Buses must
b
e
l
a
b
e
l
e
d
. Examp
l
es o
f
l
ega
l
bus names are:
DB[0-12]
DB[0:12]
DB[0..12]
DB0, DB1, CLK
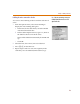
You can use t
h
e Auto-Repeat
f
unction to
place the wires that connect the pins to the
bus because the wires will be the same
length and fixed distances.