
User Guide


Example—Creating a Hierarchical Design
249
Selecting the block and naming the new schematic
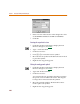
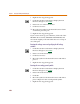
1 Click the CMOSINV block to select it.
2 From the Navigate menu, select Push.
Because the block is new, the Setup Block dialog box
appears.
3 Enter the new schematic name,
cmos.
4 Click OK.
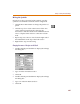
5 Move the interface port symbols in the same way you
move other symbols:
a Click to select it.
b Drag it to the desired location.
c Release to complete the move.
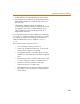
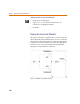
Now draw the schematic for the CMOSINV block as
shown in Figure 21.
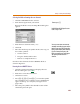
Drawing the two MOSFET devices
1 Click the Get New Part button to display the Part
Browser dialog box (see 7-245
).
2 Enter
M2N6804 in the Part text box.
3 Click Place & Close.
4 Press C+R, C+R and C+F to rotate the symbol
twice and flip it once so that the source and bulk pins
appear at the top. (To verify M1, see Figure 21 on
page 7-248.)
5 Move the part symbol to the desired location of M1
and click to place the part.
Shortcut: press 2
Dou
bl
e-c
l
ic
k
ing t
h
e
bl
oc
k
gives t
h
e same
results as steps 1 and 2.
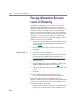
You are presente
d
wit
h
a new sc
h
ematic
containing one interface input port and one
interface output port. (They represent the
block you drew on the top-level schematic.)
If you had connected more pins to the
block, more interface ports would appear
after pushing into the lower-level
schematic.