
User Guide


Chapter 7 Creating and Editing Hierarchical Designs
242
Passing Information Between
Levels of Hierarchy
With PSpice Schematics, you can create a lower-level
schematic such that different instances of it will have
different component values. For instance, a lower-level
schematic contains a certain resistor. The hierarchical
block or symbol representing the lower-level schematic
defines the value of the resistor. The following procedure
shows how you can place one instance of a block and
define the resistor value to be 10K and another instance
and have the resistor value be 20k.
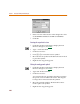
1 In the lower-level schematic, double-click the resistor
value to display the Set Attribute Value dialog box
(refer to 4-105
).
2 In the Value text box enter {@RESISTORVALUE}.
3 Click OK.
4 Save the lower-level schematic.
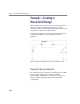
5 Place a block representing the lower-level schematic
on the top-level (or higher-level) schematic (see
Creating and Editing Hierarchical Blocks
on page 7-228).
6 Select the block.
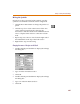
7 From the Edit menu, select Attributes to display the
Attribute Editing dialog box (refer to 4-88
).
8 Add an attribute called RESISTORVALUE with a value
of 10k.
9 Click OK.
10 Place another block representing that same
lower-level schematic on the top-level schematic.
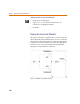
When you netlist the top-level schematic, the two
instances of the lower-level schematic will have different
resistor values.This is due to the way that attributes are
evaluated in PSpice Schematics.
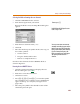
• PSpice Schematics first searches for an attribute at the
present level of the hierarchy. If the attribute is not
Shortcut: Press C+S