
User Guide


Chapter 6 Creating and Editing Symbols
176
2 Enter a name for the part in the Part Name text box
(TestCase, for example).
3 Enter a description of the part in the Description text
box.
4 Leave the AKO Name text box blank, and select Do
not display in the Part Browser check box.
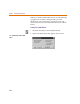
5 Click OK.
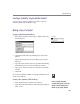
Saving the symbol to a library
1 From the File menu, select Save.
2 In the File Name text box, type the name of the library.
3 Click OK.
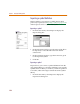
4 In the Configure dialog box, answer Yes to “Add to list
of PSpice Schematics configured libraries?”
Now you can draw a symbol using the procedures given
in Drawing Symbol Graphics
on page 6-178 and Defining and
Editing Pin Types on page 6-191.
You have defined this to be a base symbol by leaving the
AKO Name text box blank and selecting the Do not
display in the Part Browser check box.
After you have created the base symbol, you can create
other symbols that reference the base symbol (that is,
AKO symbols).