
Network Router User Manual
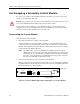
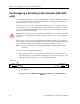

Table Of Contents
- Notices
- Contents
- About This Manual
- Introduction
- Hot Swapping Line Cards and Control Modules
- Bridging Configuration Guide
- Bridging Overview
- VLAN Overview
- Configuring SSR Bridging Functions
- Monitoring Bridging
- Configuration Examples
- SmartTRUNK Configuration Guide
- ATM Configuration Guide
- Packet-over-SONET Configuration Guide
- DHCP Configuration Guide
- IP Routing Configuration Guide
- IP Routing Protocols
- Configuring IP Interfaces and Parameters
- Configuring IP Interfaces to Ports
- Configuring IP Interfaces for a VLAN
- Specifying Ethernet Encapsulation Method
- Configuring Jumbo Frames
- Configuring Address Resolution Protocol (ARP)
- Configuring Reverse Address Resolution Protocol (RARP)
- Configuring DNS Parameters
- Configuring IP Services (ICMP)
- Configuring IP Helper
- Configuring Direct Broadcast
- Configuring Denial of Service (DOS)
- Monitoring IP Parameters
- Configuring Router Discovery
- Configuration Examples
- VRRP Configuration Guide
- RIP Configuration Guide
- OSPF Configuration Guide
- BGP Configuration Guide
- Routing Policy Configuration Guide
- Route Import and Export Policy Overview
- Configuring Simple Routing Policies
- Configuring Advanced Routing Policies
- Multicast Routing Configuration Guide
- IP Policy-Based Forwarding Configuration Guide
- Network Address Translation Configuration Guide
- Web Hosting Configuration Guide
- Overview
- Load Balancing
- Web Caching
- IPX Routing Configuration Guide
- Access Control List Configuration Guide
- Security Configuration Guide
- QoS Configuration Guide
- Performance Monitoring Guide
- RMON Configuration Guide
- LFAP Configuration Guide
- WAN Configuration Guide
- WAN Overview
- Frame Relay Overview
- Configuring Frame Relay Interfaces for the SSR
- Monitoring Frame Relay WAN Ports
- Frame Relay Port Configuration
- Point-to-Point Protocol (PPP) Overview
- Configuring PPP Interfaces
- Monitoring PPP WAN Ports
- PPP Port Configuration
- WAN Configuration Examples
- New Features Supported on Line Cards

SmartSwitch Router User Reference Manual 15
Chapter 2: Hot Swapping Line Cards and Control Modules
Removing the Line Card
To remove a line card from the SSR:
1. Make sure the Offline LED on the line card is lit.
Warning
:
Do not remove the line card unless the Offline LED is lit. Doing so can cause the
SSR to crash.
2. Loosen the captive screws on each side of the line card.
3. Carefully remove the line card from its slot in the SSR chassis.
Installing a New Line Card
To install a new line card:
1. Slide the line card all the way into the slot, firmly but gently pressing the line card
fully in place to ensure that the pins on the back of the line card are completely seated
in the backplane.
Note:
Make sure the circuit card (and not the metal plate) is between the card
guides. Check both the upper and lower tracks.
2. Tighten the captive screws on each side of the line card to secure it to the chassis.
Once the line card is installed, the SSR recognizes and activates it. The Online LED
button lights.
Hot Swapping One Type of Line Card With Another
You can hot swap one type of line card with another type. For example, you can replace a
10/100Base-TX line card with a 1000Base-SX line card. The SSR can be configured to
accommodate whichever line card is installed in the slot. When one line card is installed,
configuration statements for that line card are used; when you remove the line card from
the slot and replace it with a different type, configuration statements for the new line card
take effect.
To set this up, you must include configuration statements for both line cards in the SSR
configuration file. The SSR determines which line card is installed in the slot and uses the
appropriate configuration statements.
For example, you may have an SSR with a 10/100Base-TX line card in slot 7 and want to
hot swap it with a 1000Base-SX line card. If you include statements for both line cards in
the SSR configuration file, the statements for the 1000Base-SX take effect immediately
after you install it in slot 7.