00-Instl_SEM-Solaris_Book Page i Monday, October 5, 1998 11:41 AM Title Page Installing and Using ® for Solstice Enterprise Manager on Solaris
00-Instl_SEM-Solaris_Book Page ii Monday, October 5, 1998 11:41 AM
00-Instl_SEM-Solaris_Book Page i Monday, October 5, 1998 11:41 AM Notice Cabletron Systems reserves the right to make changes in speciÞcations and other information contained in this document without prior notice. The reader should in all cases consult Cabletron Systems to determine whether any such changes have been made. The hardware, Þrmware, or software described in this manual is subject to change without notice.
00-Instl_SEM-Solaris_Book Page ii Monday, October 5, 1998 11:41 AM Restricted Rights Notice (Applicable to licenses to the United States Government only.) 1. Use, duplication, or disclosure by the Government is subject to restrictions as set forth in subparagraph (c) (1) (ii) of the Rights in Technical Data and Computer Software clause at DFARS 252.227-7013. Cabletron Systems, Inc., 35 Industrial Way, Rochester, New Hampshire 03867-0505. 2.
00-Instl_SEM-Solaris_Book Page iii Monday, October 5, 1998 11:41 AM Contents Chapter 1 Introduction to SPECTRUM for Solstice Enterprise Manager on Solaris Using this Guide .....................................................................................1-2 WhatÕs NOT in this Guide . . .........................................................1-4 Year 2000 Compliance ............................................................................1-4 Conventions..............................................
00-Instl_SEM-Solaris_Book Page iv Monday, October 5, 1998 11:41 AM Contents Using SPMA Applications in a Stand-alone Mode ......................... 2-20 WhatÕs Next?......................................................................................... 2-21 Chapter 3 Getting Started Creating Cabletron Network Objects .................................................. 3-1 Using the SPMA Discover Application............................................... 3-2 Launching SPMA Discover ......................
00-Instl_SEM-Solaris_Book Page v Monday, October 5, 1998 11:41 AM Contents The SPMA Launcher Database........................................................... 4-22 Changing the Polling Rate........................................................... 4-23 Sorting the Devices Listed in the Database............................... 4-24 Deleting Devices from the Database .......................................... 4-24 Using the Restore Button .............................................................
00-Instl_SEM-Solaris_Book Page vi Monday, October 5, 1998 11:41 AM Contents vi
00-Instl_SEM-Solaris_Book Page 1 Monday, October 5, 1998 11:41 AM Chapter 1 Introduction to SPECTRUM for Solstice Enterprise Manager on Solaris How to use this guide; manual conventions; contacting the Cabletron Systems Global Call Center SPECTRUM¨ for Solstice Enterprise Manager (SEM) adds comprehensive remote management support for all of Cabletron SystemsÕ intelligent network management devices to Sun MicrosystemsÕ Solstice Enterprise Manager network management platform.
00-Instl_SEM-Solaris_Book Page 2 Monday, October 5, 1998 11:41 AM Introduction to SPECTRUM for Solstice Enterprise Manager on Solaris views themselves, via the Glyph menu; or, for operation in stand-alone mode, from the Stand-alone Launcher or the command line. SPECTRUM for SEM also expands the graphical reporting capabilities of Solstice Enterprise Manager by providing pie chart and meter tools that allow you to dynamically display network data and performance statistics.
00-Instl_SEM-Solaris_Book Page 3 Monday, October 5, 1998 11:41 AM Introduction to SPECTRUM for Solstice Enterprise Manager on Solaris The System Message Reference Guide explains the source of a variety of error and informational messages you may see; corrective user action is also provided, where appropriate.
00-Instl_SEM-Solaris_Book Page 4 Monday, October 5, 1998 11:41 AM Introduction to SPECTRUM for Solstice Enterprise Manager on Solaris devices. This Appendix also describes how to create a generic SNMP icon for general SNMP stack management of third-party devices. What’s NOT in this Guide . . .
00-Instl_SEM-Solaris_Book Page 5 Monday, October 5, 1998 11:41 AM Introduction to SPECTRUM for Solstice Enterprise Manager on Solaris workstationÕs system time value to display the time and date of the last contact change Ñ will now display these date values with eight digits (05/31/1998) instead of six (05/31/98).
00-Instl_SEM-Solaris_Book Page 6 Monday, October 5, 1998 11:41 AM Introduction to SPECTRUM for Solstice Enterprise Manager on Solaris re-size the information in the window; it just changes the amount of information that can be displayed (see Figure 1-1). When you shrink a window, scroll bars will appear as necessary so that you can scroll to view all the information that is available.
00-Instl_SEM-Solaris_Book Page 7 Monday, October 5, 1998 11:41 AM Introduction to SPECTRUM for Solstice Enterprise Manager on Solaris Figure 1-2. The History Window Launching Documentation The SPMA documentation set is now provided in electronic format and installed with your SPMA program Þles, along with AdobeÕs Acrobat Reader application.
00-Instl_SEM-Solaris_Book Page 8 Monday, October 5, 1998 11:41 AM Introduction to SPECTRUM for Solstice Enterprise Manager on Solaris Using the Mouse The UNIX mouse has three buttons. Procedures within the SPMA document set refer to these buttons as follows: Button 1 Button 2 Button 3 Figure 1-3. Mouse Buttons If youÕre using a two-button mouse, donÕt worry. SPMA doesnÕt make use of mouse button 2. Just click the left button for button 1 and the right mouse button when instructed to use mouse button 3.
00-Instl_SEM-Solaris_Book Page 9 Monday, October 5, 1998 11:41 AM Introduction to SPECTRUM for Solstice Enterprise Manager on Solaris mouse button to use. All other panels from which menus can be accessed, and all buttons which do not provide access to menus, will operate according to SPMA convention, as documented. Getting Help If you need additional support related to SPMA, or if you have any questions, comments, or suggestions related to this manual, contact the Cabletron Systems Global Call Center.
00-Instl_SEM-Solaris_Book Page 10 Monday, October 5, 1998 11:41 AM Introduction to SPECTRUM for Solstice Enterprise Manager on Solaris For additional information about Cabletron Systems products, visit our World Wide Web site: http://www.cabletron.com/. For technical support, select Service and Support.
00-Instl_SEM-Solaris_Book Page 1 Monday, October 5, 1998 11:41 AM Chapter 2 Installing SPECTRUM for Solstice Enterprise Manager Hardware and software requirements; installation procedures; installing SPMA modules for stand-alone operation Beginning with the 3.2rev1 release, SPMA applications are now sold and shipped as a single part number which includes all available applications and device support.
00-Instl_SEM-Solaris_Book Page 2 Monday, October 5, 1998 11:41 AM Installing SPECTRUM for Solstice Enterprise Manager Installing SPMA Files on your Workstation Whether youÕre installing SPECTRUM for Solstice Enterprise Manager on Solaris for the Þrst time, or installing an additional device module or product upgrade, you follow the same simple procedure to install the SPMA Þles on your workstation Ñ including choosing the modules you wish to install.
00-Instl_SEM-Solaris_Book Page 3 Monday, October 5, 1998 11:41 AM Installing SPECTRUM for Solstice Enterprise Manager applications simultaneously, you may improve performance by assigning additional swap space.
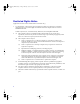
00-Instl_SEM-Solaris_Book Page 4 Monday, October 5, 1998 11:41 AM Installing SPECTRUM for Solstice Enterprise Manager To Install from a Local CD-ROM Drive 1. Log on to the workstation as root. NOTE If you are running on Solaris with the vold process (volume manager daemon), skip steps 2 and 3 below. When you insert a CD on a system running the volume manager daemon, the CD filesystem is automatically mounted by the system. 2. Create a directory for the CD mount point by typing: mkdir /cdrom 3.
00-Instl_SEM-Solaris_Book Page 5 Monday, October 5, 1998 11:41 AM Installing SPECTRUM for Solstice Enterprise Manager 5. If you did not start the windowing environment as root you will also need to give root permission to display by switching to the username you used to launch the windowing environment, and typing the following from the command line: xhost + To Install from a Remote CD-ROM Drive 1. Log on to the CD-ROM host workstation as root.
00-Instl_SEM-Solaris_Book Page 6 Monday, October 5, 1998 11:41 AM Installing SPECTRUM for Solstice Enterprise Manager TIP Adding the line specified above to your /etc/dfs/dfstab file will permanently export the CD-ROM filesystem (until the line is removed); exporting from the command line only will export the CD-ROM filesystem until the next time you re-boot. 5. Log on to the target workstation as root. 6. Create a directory for the CD mount point by typing: mkdir /cdrom 7.
00-Instl_SEM-Solaris_Book Page 7 Monday, October 5, 1998 11:41 AM Installing SPECTRUM for Solstice Enterprise Manager 9. Mount the CDROM drive workstation using the following command: if you are using a Solaris machine as the CD drive workstation mount -r -o hard,intr :/cdrom/cdrom0 /cdrom The commands above and below should each be entered as one line.
00-Instl_SEM-Solaris_Book Page 8 Monday, October 5, 1998 11:41 AM Installing SPECTRUM for Solstice Enterprise Manager The Install Platform Selection window, Figure 2-1, will be displayed. Figure 2-1. The Install Platform Selection Window 2. Click in the appropriate fields to select the operating system and network management system (if applicable) on which you will be running the SPMA applications.
00-Instl_SEM-Solaris_Book Page 9 Monday, October 5, 1998 11:41 AM Installing SPECTRUM for Solstice Enterprise Manager TIP Be sure you have adequate hard disk space to install the options you have selected; see Hardware Requirements, page 2-2, for module size estimates. Figure 2-2. Install Product Selection Window 4. Click on Next to proceed with installation; an Install Configuration window like the example shown Figure 2-3 will appear.
00-Instl_SEM-Solaris_Book Page 10 Monday, October 5, 1998 11:41 AM Installing SPECTRUM for Solstice Enterprise Manager TIP You can also click on Previous to return to the Platform Selection window, and change any settings you have made there before continuing with the install procedure. Figure 2-3. Install ConÞguration window NOTE If you decide not to go on with the installation at any time, click on Quit from this or any of the preceding windows to stop the installation process. 5.
00-Instl_SEM-Solaris_Book Page 11 Monday, October 5, 1998 11:41 AM Installing SPECTRUM for Solstice Enterprise Manager ! CAUTION We strongly recommend that you install to the default /usr directory.
00-Instl_SEM-Solaris_Book Page 12 Monday, October 5, 1998 11:41 AM Installing SPECTRUM for Solstice Enterprise Manager 6. To proceed with the installation click on Install. Progress will be reported via the status bar at the bottom of the Install Configuration window (see Figure 2-5). Figure 2-5. Installation Progress Indicator 7. When all of the SPMA application files have been copied, you will be prompted to integrate SPMA with your network management system.
00-Instl_SEM-Solaris_Book Page 13 Monday, October 5, 1998 11:41 AM Installing SPECTRUM for Solstice Enterprise Manager Integrating SPMA with Solstice Enterprise Manager Several Solstice Enterprise Manager Þles and directories must be updated to include the information used to run SPMA.
00-Instl_SEM-Solaris_Book Page 14 Monday, October 5, 1998 11:41 AM Installing SPECTRUM for Solstice Enterprise Manager Second, you will be prompted to re-initialize Solstice Enterprise Manager to complete the integration process. If you choose to re-initialize, the integration script will run the em_services -r command for you immediately, and SPMA will be ready to run.
00-Instl_SEM-Solaris_Book Page 15 Monday, October 5, 1998 11:41 AM Installing SPECTRUM for Solstice Enterprise Manager TIP If youÕre not sure what shell youÕre using Ñ and therefore which of the procedures below you should follow Ñ type echo $SHELL; if the response comes back /bin/csh, you are using C shell; if it comes back /bin/ksh, you are using Korn shell; and if it comes back /bin/sh, you are using Bourne shell.
00-Instl_SEM-Solaris_Book Page 16 Monday, October 5, 1998 11:41 AM Installing SPECTRUM for Solstice Enterprise Manager For all shells, be sure you have logged in with the user name that you will use to run SPMA, then use your favorite text editor to do the following: For C Shell Make the following entry in your .login Þle: setenv CTRONDB For Korn and Bourne Shell Make the following entry in your .
00-Instl_SEM-Solaris_Book Page 17 Monday, October 5, 1998 11:41 AM Installing SPECTRUM for Solstice Enterprise Manager TIP Be sure each user who will be running SPMA applications from the same workstation runs this script while logged in with the user name he or she will be using to run SPMA; the necessary files will only be copied once each time the script is run, to the location defined by the currently active definition of CTRONDB! A Note About Environment Variables (For Previous Users Only!) As ment
00-Instl_SEM-Solaris_Book Page 18 Monday, October 5, 1998 11:41 AM Installing SPECTRUM for Solstice Enterprise Manager Testing for and Correcting Potential NIS Problems ! CAUTION The following information concerns only those networks which use NIS; if your network uses DNS or any other network information service, you should not use the pnisd daemon described below. In some network environments, NIS servers can take a signiÞcant amount of time to resolve host names to IP addresses.
00-Instl_SEM-Solaris_Book Page 19 Monday, October 5, 1998 11:41 AM Installing SPECTRUM for Solstice Enterprise Manager a. During installation, a default rc.ctron file was copied to the /usr/ctron/conf directory; move this file to the location and name specified below: /usr/ctron/conf/rc.ctron to /etc/rc3.d/S99rcctron b. Using your favorite text editor, open the file.
00-Instl_SEM-Solaris_Book Page 20 Monday, October 5, 1998 11:41 AM Installing SPECTRUM for Solstice Enterprise Manager By default, the pnisd daemon will copy the NIS database to the /tmp directory on the local machine, and will refresh the database every 5 minutes.
00-Instl_SEM-Solaris_Book Page 21 Monday, October 5, 1998 11:41 AM Installing SPECTRUM for Solstice Enterprise Manager installation procedure described above. SpeciÞc commands for starting each application are included in the SPMA Tools Guide and in each device- and application speciÞc UserÕs Guide; the Stand-alone Launcher is described in Chapter 4, Using the Stand-alone Launcher. NOTE Note that the installation procedure does not require you to add /usr/ctron/bin to your PATH variable.
00-Instl_SEM-Solaris_Book Page 22 Monday, October 5, 1998 11:41 AM Installing SPECTRUM for Solstice Enterprise Manager 2-22 What’s Next?
00-Instl_SEM-Solaris_Book Page 1 Monday, October 5, 1998 11:41 AM Chapter 3 Getting Started Using SPMA Discover; manually creating Cabletron device glyphs; configuring glyph object properties; a few words about MIB components and community names A Cabletron device glyph in a Solstice Enterprise Manager management database gives you the best of both worlds: the Solstice Enterprise Manager generic SNMP applications and SPMA tools and applications tailored speciÞcally for your Cabletron devices.
00-Instl_SEM-Solaris_Book Page 2 Monday, October 5, 1998 11:41 AM Getting Started use the Solstice Enterprise Manager Discover tool to create your network objects, you automatically create glyphs that represent your network objects, including Cabletron devices; however, the SEM Discover tool cannot create Cabletron Systems glyphs. For that, you need SPMA Discover.
00-Instl_SEM-Solaris_Book Page 3 Monday, October 5, 1998 11:41 AM Getting Started Launching SPMA Discover The SPMA Discover tool is located in the Solstice Enterprise Manager console Tools menu. It doesnÕt matter which console view window you have open when you launch SPMA Discover; SPMA Discover will examine every active (that is, pingable) component in the currently open management database before it stops.
00-Instl_SEM-Solaris_Book Page 4 Monday, October 5, 1998 11:41 AM Getting Started NOTE When SPMA Discover converts an SEM glyph to a Cabletron glyph, it assigns to the new glyph the community name used in the discover process. If this community name does not provide adequate access to your Cabletron devices Ñ for example, if it provides only Read access, but no Write capabilities Ñ you will need to edit each glyphÕs Object Properties to assign the appropriate community names.
00-Instl_SEM-Solaris_Book Page 5 Monday, October 5, 1998 11:41 AM Getting Started 2. Select Tools—>Object Palette to open the Object Palette Viewer. 3. In the Object Palette window, click to select the object you want. The Object Configuration Tool window, which allows you to configure object properties, will appear. NOTES All Cabletron device names begin with the designation Òcsi,Ó as in csiEMME.
00-Instl_SEM-Solaris_Book Page 6 Monday, October 5, 1998 11:41 AM Getting Started To access the Object ConÞguration Tool window: 1. Click mouse button 3 on the glyph to display the Glyph menu. 2. Drag down to Object Properties and release; the glyph’s Object Configuration Tool window, Figure 3-1, will appear. Figure 3-1.
00-Instl_SEM-Solaris_Book Page 7 Monday, October 5, 1998 11:41 AM Getting Started NOTE When you manually create a glyph using the Object Palette, the glyphÕs Configuration Tool window will appear automatically.
00-Instl_SEM-Solaris_Book Page 8 Monday, October 5, 1998 11:41 AM Getting Started Assigning or Editing Community Names There are three Þelds in the middle of the Object ConÞguration Tool window (in the Object Description section) that allow you to edit and/or set community name access for the device associated with the selected glyph: sNMPusrRdCommunity and sNMPusrWrCommunity For older Cabletron devices, use these lines to specify the community names that grant READ and WRITE access to the device.
00-Instl_SEM-Solaris_Book Page 9 Monday, October 5, 1998 11:41 AM Getting Started Selecting MIB Agent Files If you plan to use the Solstice SNMP Browser tool against the Cabletron devices you are adding, you may want to assign the appropriate MIB agent Þles to each glyph so that the Browser can successfully query each deviceÕs MIBs. Some Cabletron MIB agents are speciÞc to a single device, such as the IIMCFN10-MIB and IIMCFN100-MIB.
00-Instl_SEM-Solaris_Book Page 10 Monday, October 5, 1998 11:41 AM Getting Started NOTES Please note that only those MIB agent files which apply to devices for which you have installed SPMA management modules will appear in the MIB agent list. Also, note that selecting MIB agent files for your glyphs is entirely optional; all installed MIB agent files can always be accessed from the SNMP Browser tool. See your Solstice Enterprise Manager documentation for details.
00-Instl_SEM-Solaris_Book Page 11 Monday, October 5, 1998 11:41 AM Getting Started For more information about conÞguring and using the SmartSwitch 9000 chassis Hub View, consult the SPMA SmartSwitch 9000 Chassis UserÕs Guide. A Few Words about MIB Components and Community Names As you might expect, the Solstice Enterprise Manager SNMP Browser, which provides access to device MIB data, requires that you supply the correct SNMP Community Name when accessing a deviceÕs MIB information.
00-Instl_SEM-Solaris_Book Page 12 Monday, October 5, 1998 11:41 AM Getting Started NOTE For more information about your deviceÕs MIB structure and what objects can be found in what components, consult the appendix at the end of your SPMA device-specific UserÕs Guide. Starting SPMA Tools and Applications Except for SPMA Discover, all SPMA tools and applications are accessible from the Glyph menu, from inside the Hub View or Bridge View, and/or from the command line (for stand-alone mode).
00-Instl_SEM-Solaris_Book Page 13 Monday, October 5, 1998 11:41 AM Getting Started Launching Documentation A new menu option available from the console Viewer window also provides access to all installed SPMA documentation Þles. (Documentation Þles are installed automatically based on the management modules you choose.) Selecting the ToolsÑ>SPMA Guide option will launch a menu Þle (illustrated in Figure 3-2) that provides a link to all available documents.
00-Instl_SEM-Solaris_Book Page 14 Monday, October 5, 1998 11:41 AM Getting Started TIP 3-14 If you select a link via the SPMAdocs.pdf menu file for a document associated with a management module you have not installed, you will be prompted to re-run the install procedure and select the missing module. You cannot view the documentation for a module you have not installed.
00-Instl_SEM-Solaris_Book Page 1 Monday, October 5, 1998 11:41 AM Chapter 4 Using the Stand-alone Launcher Adding devices to the Launcher database; how to assign the appropriate community names; discovering devices; launching applications from the Launcher and the command line; using and customizing the Launcher menus; viewing documentation Outside the Solstice Enterprise Manager platform, SPMA applications can be accessed in either of two ways: directly from the command line (as speciÞcally described in
00-Instl_SEM-Solaris_Book Page 2 Monday, October 5, 1998 11:41 AM Using the Stand-alone Launcher About the Stand-alone Launcher The Stand-alone Launcher serves as a kind of simple network map, providing you with a quick view of device status and a database in which to store information about each of the Cabletron management devices installed on your network. The Launcher also provides a list box- and menu-driven means of accessing the applications that are available for managing each device.
00-Instl_SEM-Solaris_Book Page 3 Monday, October 5, 1998 11:41 AM Using the Stand-alone Launcher Use the new Guide menu for access to the electronic document set. Figure 4-1.
00-Instl_SEM-Solaris_Book Page 4 Monday, October 5, 1998 11:41 AM Using the Stand-alone Launcher ! CAUTION The database created by the Launcher will be stored, along with other SPMA configuration information, in the CTRONDB directory you defined during installation. If more than one user will be running SPMA applications from the same workstation and each wishes to maintain a separate database of devices, the CTRONDB variable must be set to a different location for each user.
00-Instl_SEM-Solaris_Book Page 5 Monday, October 5, 1998 11:41 AM Using the Stand-alone Launcher Device Type Displays the device type: EMME, MRXI-24, TRMM, etc., as detected by the most recent successful poll. Host Name/IP Address Displays the hostname or IP address used to deÞne the device when it was entered in the database.
00-Instl_SEM-Solaris_Book Page 6 Monday, October 5, 1998 11:41 AM Using the Stand-alone Launcher Adding Devices to the Launcher Database There are two ways to add devices to the database: you can add them one at a time via the EditÑ>Add Device menu option, or you can perform a discover on one or more network segments (see Using the Discover Tool, page 4-13, for more information on discovery). You can also add a SmartSwitch 9000 six- or 14-slot chassis to the launcher database, as described below.
00-Instl_SEM-Solaris_Book Page 7 Monday, October 5, 1998 11:41 AM Using the Stand-alone Launcher Figure 4-2. SPMA Launcher Add Device window 2. Enter the device’s Host Name or IP Address, as desired, by clicking in the appropriate selection box to place the cursor in the text box, then entering the value.
00-Instl_SEM-Solaris_Book Page 8 Monday, October 5, 1998 11:41 AM Using the Stand-alone Launcher NOTE SPMA generates network traffic with every poll; keep in mind that shorter intervals mean increased network traffic. 4.
00-Instl_SEM-Solaris_Book Page 9 Monday, October 5, 1998 11:41 AM Using the Stand-alone Launcher 5. Click on Apply to add the device; if the entered IP address or host name is associated with an active device, the device entry will immediately appear in the list box with its contact status displayed, and will also be added to the database. The Add Device window will remain open, allowing you to add additional devices if desired.
00-Instl_SEM-Solaris_Book Page 10 Monday, October 5, 1998 11:41 AM Using the Stand-alone Launcher accommodate multiple instances of the same MIB component (as occurs in multi-channel Ethernet repeaters or multi-ring Token Ring devices).
00-Instl_SEM-Solaris_Book Page 11 Monday, October 5, 1998 11:41 AM Using the Stand-alone Launcher Adding a SmartSwitch 9000 Chassis If you wish to add an individual SmartSwitch 9000 module to the Launcher, you may do so by following the instructions in the previous section; because each of these modules is an intelligent device with its own management capability and its own IP address, they are handled by the Launcher just like any other MMAC or stand-alone device.
00-Instl_SEM-Solaris_Book Page 12 Monday, October 5, 1998 11:41 AM Using the Stand-alone Launcher You can add both new and previously-deÞned SmartSwitch 9000 Chassis Views to the Launcher database, as follows: 1. From the Launcher menu bar select Edit and drag down to Add Device.The SPMA Launcher: Add Device window (Figure 4-2, on page 4-7) will appear. 2. Enter the database name associated with the SmartSwitch 9000 chassis in the Host Name/IP Address field.
00-Instl_SEM-Solaris_Book Page 13 Monday, October 5, 1998 11:41 AM Using the Stand-alone Launcher A Special Note About the SmartSwitch 9500 There is one special case in the SmartSwitch 9000 family of devices: the SmartSwitch 9500.
00-Instl_SEM-Solaris_Book Page 14 Monday, October 5, 1998 11:41 AM Using the Stand-alone Launcher Figure 4-3. SPMA Launcher Discover window The initial time you open the Discover window, only the Device Type list box will have any entries; once you have added Community Names and/or IP Address ranges, they will be saved in databases and will be listed each time you open the Discover window.
00-Instl_SEM-Solaris_Book Page 15 Monday, October 5, 1998 11:41 AM Using the Stand-alone Launcher ! CAUTION The databases created by the Discover tool will be stored, along with the Stand-alone Launcher database and other SPMA configuration information, in the CTRONDB directory you defined during installation.
00-Instl_SEM-Solaris_Book Page 16 Monday, October 5, 1998 11:41 AM Using the Stand-alone Launcher and added to the database. You can add multiple SNMP Community Names to this list box, and select only those you wish to use for each discovery session. IP Address Ranges The Discover tool searches for Cabletron devices on your network by sending requests (Þrst PING, then SNMP) to the IP addresses within the range or ranges you deÞne here.
00-Instl_SEM-Solaris_Book Page 17 Monday, October 5, 1998 11:41 AM Using the Stand-alone Launcher Polling Rate (sec) Displays the interval at which the Stand-alone Launcher will poll the discovered devices once they are added to the Launcher database. You can change the polling interval from this Þeld; the default polling rate is 600 seconds. See Changing the Polling Rate, page 4-23, for more information.
00-Instl_SEM-Solaris_Book Page 18 Monday, October 5, 1998 11:41 AM Using the Stand-alone Launcher TIP You can rearrange the list so that the community names are listed in a more logical order (e.g., decreasing order of use) by using the Up and Down buttons located below the list box. You may only move one entry at a time. To delete a community name from the list box: 1. Click on the Delete button while a community name is selected to delete a community name from the list box.
00-Instl_SEM-Solaris_Book Page 19 Monday, October 5, 1998 11:41 AM Using the Stand-alone Launcher 3. Press Return or click on the Add button to add the IP address range to the list box. The ranges you set in this window will be saved in an IP Address Range database and will appear in the list box for use each time you use the Discover Tool. 4. Repeat as necessary to add additional ranges to the list box. TIP You can rearrange the list so that the IP Address Ranges are listed in a more logical order (e.g.
00-Instl_SEM-Solaris_Book Page 20 Monday, October 5, 1998 11:41 AM Using the Stand-alone Launcher NOTE The community name used to discover the device will be used in the Launcher database as the Write or Chassis community name (as appropriate) when the device is added. 3. In the IP Address Ranges list box, click to select the IP Address Range(s) you want to use in the discovery process.
00-Instl_SEM-Solaris_Book Page 21 Monday, October 5, 1998 11:41 AM Using the Stand-alone Launcher As the discovery progresses, the Progress Þelds (Visited and Added) will increment as appropriate. Devices are added to the launcher in the order that they are discovered, even if the devices already existing in your database have been sorted; for more information, see Sorting the Devices Listed in the Database, page 4-24. Figure 4-4 is an example of a working discover window. Figure 4-4.
00-Instl_SEM-Solaris_Book Page 22 Monday, October 5, 1998 11:41 AM Using the Stand-alone Launcher The SPMA Launcher Database Once you have added your devices to the database, they will be displayed automatically each time you start the launcher, as illustrated in Figure 4-5. Contact Status Color codes indicate SPMA’s ability to contact the listed devices Lower Window Display Note that the information displayed in the lower portion of the window applies to the highlighted device: an FDMMIM.
00-Instl_SEM-Solaris_Book Page 23 Monday, October 5, 1998 11:41 AM Using the Stand-alone Launcher Each time you start the Launcher, an attempt is made to determine the correct device type for all IP addresses in the database. If a device is improperly identiÞed, the Launcher will change the entry to the correct device type (and display a footer message at the bottom of the window). This can occur due to re-assignment of IP addresses among devices.
00-Instl_SEM-Solaris_Book Page 24 Monday, October 5, 1998 11:41 AM Using the Stand-alone Launcher Sorting the Devices Listed in the Database Initially, devices will appear in the list box in the order they were added, either manually or via the Discover tool. To sort them alphabetically by device type, click on Edit in the Launcher menu bar, drag down to Sort List by, then across to select Device Type (multiple devices of the same type will be listed in a random order).
00-Instl_SEM-Solaris_Book Page 25 Monday, October 5, 1998 11:41 AM Using the Stand-alone Launcher Launching Applications Once you have added your devices to the database, you can use the Applications menu to launch the applications which are available for the device currently selected in the list box. To launch an application: 1. Click in the list box to select the device you wish to manage. 2. Click on Applications from the Launcher menu bar to display the Applications menu. 3.
00-Instl_SEM-Solaris_Book Page 26 Monday, October 5, 1998 11:41 AM Using the Stand-alone Launcher Just make sure youÕre in the right directory Ñ /usr/ctron/bin Ñ or that your path environment variable is set up so that all Þles can be located from any directory (/usr/ctron/bin must be included in the PATH line). SpeciÞc commands for starting each application are included in the SPMA Tools Guide and in each device- and application-speciÞc UserÕs Guide.
00-Instl_SEM-Solaris_Book Page 27 Monday, October 5, 1998 11:41 AM Using the Stand-alone Launcher 4. Following the pattern used in the original, add an additional line for each application in the following format: Application [argument] Where: is the name of your application as you would like it to appear on the Application menu; note that there can be no white space between words. is the full path to the executable file.
00-Instl_SEM-Solaris_Book Page 28 Monday, October 5, 1998 11:41 AM Using the Stand-alone Launcher NOTE When they are added to the Launcher database, some Cabletron device types require a Chassis Manager community name; others require separate Read and Write community names. When adding an application to a deviceÕs menu, be sure to specify the arguments appropriate to the device.
00-Instl_SEM-Solaris_Book Page 29 Monday, October 5, 1998 11:41 AM Using the Stand-alone Launcher With its Guide menu, the Stand-alone Launcher window provides special access to a menu Þle (illustrated in Figure 4-6) that provides links to all available documents. You can also access this menu Þle (called SPMAdocs.pdf) and any other document Þle directly via Acrobat Reader. Documentation Þles are installed in the /usr/ctron/documentation directory. Figure 4-6. The SPMAdocs.
00-Instl_SEM-Solaris_Book Page 30 Monday, October 5, 1998 11:41 AM Using the Stand-alone Launcher 4-30 Viewing Documentation
00-Instl_SEM-Solaris_Book Page 1 Monday, October 5, 1998 11:41 AM Appendix A Cabletron Device MIB Agents A complete list of the MIB agent files to select when manually creating a Cabletron device glyph; creating a generic SNMP glyph Configuring a Manually-Created Glyph If you plan to use Solstice Enterprise ManagerÕs SNMP Browser to access information from Cabletron devices whose glyphs have been created manually (that is, without using Discover and SPMA Discover), you will need to select the appropriate
00-Instl_SEM-Solaris_Book Page 2 Monday, October 5, 1998 11:41 AM Cabletron Device MIB Agents modules, by topology type; and one which lists SmartSwitch 9000 modules, also grouped by topology type. When conÞguring a glyph for a device which has a BRIM or HSIM installed, be sure to check the BRIM/HSIM table for any additional Þles that should be selected. Cabletron Device MIB Agent Tables MMAC and Standalone Devices Table A-1.
00-Instl_SEM-Solaris_Book Page 3 Monday, October 5, 1998 11:41 AM Cabletron Device MIB Agents Table A-1.
00-Instl_SEM-Solaris_Book Page 4 Monday, October 5, 1998 11:41 AM Cabletron Device MIB Agents Table A-1.
00-Instl_SEM-Solaris_Book Page 5 Monday, October 5, 1998 11:41 AM Cabletron Device MIB Agents Table A-1.
00-Instl_SEM-Solaris_Book Page 6 Monday, October 5, 1998 11:41 AM Cabletron Device MIB Agents Table A-1.
00-Instl_SEM-Solaris_Book Page 7 Monday, October 5, 1998 11:41 AM Cabletron Device MIB Agents Table A-1.
00-Instl_SEM-Solaris_Book Page 8 Monday, October 5, 1998 11:41 AM Cabletron Device MIB Agents BRIM/HSIM Modules If you are conÞguring a glyph for a device which has a BRIM or HSIM installed, be sure to check the chart below to determine if additional agent Þles should be selected. Table A-2.
00-Instl_SEM-Solaris_Book Page 9 Monday, October 5, 1998 11:41 AM Cabletron Device MIB Agents SmartSwitch 9000 Devices NOTE To create a glyph for any individual SmartSwitch 9000 module, select the appropriate component from the EditÑ>CreateÑ>Component menu; conÞgure the object as usual, assigning a valid community name and selecting the agent Þles listed on the chart that follows. To create a glyph for a SmartSwitch 9000 chassis, select the csi9000 six- or 14-slot chassis component.
00-Instl_SEM-Solaris_Book Page 10 Monday, October 5, 1998 11:41 AM Cabletron Device MIB Agents Table A-3.
00-Instl_SEM-Solaris_Book Page 11 Monday, October 5, 1998 11:41 AM Cabletron Device MIB Agents Table A-3.
00-Instl_SEM-Solaris_Book Page 12 Monday, October 5, 1998 11:41 AM Cabletron Device MIB Agents Creating and Using the Generic SNMP Glyph Although third-party devices are not supported by SPECTRUM for Solstice Enterprise Manager, a generic SNMP glyph has been included to provide you with general SNMP management for any networking device which supports the SNMP stack, via both the Solstice Enterprise Manager SNMP Browser and the SPMA MIB I, II application. To create and conÞgure a generic SNMP glyph: 1.
00-Instl_SEM-Solaris_Book Page 1 Monday, October 5, 1998 11:41 AM Index A D accessing third-party applications 4-26 agent schemas 3-5, A-1 Applications, launching 4-25 automatically-created glyphs 3-1 database 4-1, 4-4 date displays (Year 2000 compliance) 1-5 Device type 4-5 Discover, SPMA 3-2 distributed chassis mode 4-13 documentation 1-7, 3-13, 4-28 B Bourne shell 2-14 Bridge views 1-1 C C shell 2-14 Cabletron device glyph 3-1 Cabletron glyph 3-2 Chassis Community 4-8 Chassis MGR 3-8, 4-10 chassis
00-Instl_SEM-Solaris_Book Page 2 Monday, October 5, 1998 11:41 AM Index H N Hardware Requirements 2-2 Help 1-9 History button 1-6 Host Name/IP Addr 4-5 hostname 4-7 Hub Views 1-1 NIS daemon 2-18 NIS Problems 2-18 I icon 4-25 icon menu 3-12, 4-25 Installation Prerequisites 2-2 installing without the user interface 2-12 IP Address 4-7 K Korn shell 2-14 L Last Contact Change 4-5 launching an SPMA tool or application 3-12 launching third-party applications 4-26 M manually-created glyphs 3-1, 3-4, A-1 m
00-Instl_SEM-Solaris_Book Page 3 Monday, October 5, 1998 11:41 AM Index T Technical Support 1-3, 1-9 third-party devices 3-2, A-12 time and date display 1-5 to access the Glyph Ñ> Tools menu 3-12 to launch an SPMA tool or application 3-12 U Uptime 4-5 /usr/ctron/bin 4-26 /usr/ctron/conf directory 2-19 V version numbers 1-9 W Web site 1-10 Write Community 4-8 Y Year 2000 compliance 1-4 Index-3
00-Instl_SEM-Solaris_Book Page 4 Monday, October 5, 1998 11:41 AM Index Index-4