
Product Manual


20
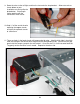
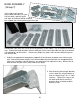
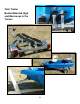
9. Route the wires to the tail lights and thru the slot under the lamp bracket. Allow extra wire as
shown below so your
installation can end up like the
photo below. Extra length
makes working with the
connections much easier.
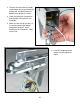
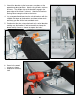
10. Strip ½” off the end of the wire
exposing the copper strands
and twist the exposed strands
to stiffen them.
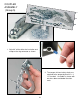
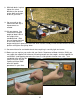
11. There are holes in the back of each tail lamp marked by color. Identify which hole is for which
color wire and push the twisted wire straight into the corresponding hole. You will feel the grip
paw inside the lamp as you push the wire under it. Once the wire is in it will not come back out.
Tug gently on the wire to be sure it seated. Repeat for the other side.