Model #: 110833 Lit.#: 98-0917/08-10 Instruction Manual Version 2.
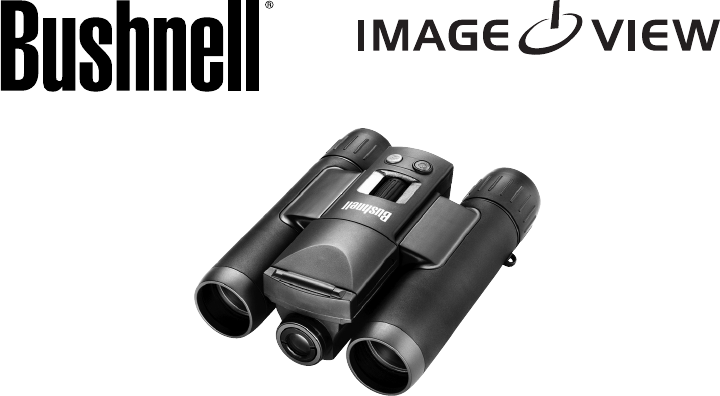
Congratulations on your purchase of the Bushnell® 3.2 MP ImageView™! Your ImageView “digital binocular” is ideal for all sporting events and nature observation, as it combines a high quality 8 power compact binocular with a versatile digital camera in a single compact unit. Your Imageview has a dual personality, capable of taking high resolution digital still photos as well as shooting video, with a maximum recording time limited only by the capacity of the memory card you use.
LCD Display Review Display Pull up both sides of this end to raise the display Resolution of the file View Button Display Button 4-way Arrow Keypad+MENU Button File # Diopter Adjustment (rotate eyepiece) Parts Guide Binocular Focus POWER Button Remote Jack Card Slot 4 JPG=photo file AVI=video file SNAP Button USB Port Power LED 3 5 6 7 8 3 2 1 # Display Icon Guide (Preview Mode) 1 Battery Indicator (“full” battery shown) 2 # of Photos/Videos Left (based on remaining memory) 3 Int
Quick Start Guide 1. 2. 3. 4. The camera is powered by two AAA batteries (not included). Slide the battery cover open (see arrow on cover) and insert batteries, using the polarity marks inside for reference. A battery indicator on the lower left corner of the display indicates remaining power. The camera has 16 MB of internal memory, so you can take photos anytime without using a card.
. 6. 7. display. Note: you may need to reset the date/time after changing batteries. To take a still photo, hold the camera steady with both hands and press the SNAP button. The camera focus is preset to take sharp photos from approximately 35 feet to “infinity”. To shoot a video, press the right arrow key three times until the red movie camera icon appears at the top right corner of the display (see below). You can then start shooting the video at any time by pressing SNAP.
Loading Batteries Turn the ImageView over, and slide open the battery cover as indicated by the arrow, setting it aside. Insert 2 AAA Alkaline or Lithium batteries into the compartment in the direction indicated by the polarity marks inside, then replace the cover and slide it back into place until it clicks. Note: Rechargeable NiMh type batteries may also be used, but some may not deliver adequate current to power the ImageView.
Basic Binocular and Camera Setup Before you begin using it, you’ll probably want to take a few moments to set up the ImageView for your individual eyesight and user preferences. Leave the rubber eyecups in their “up” position if you are not wearing glasses, or roll them down if you are. Grasp the left and right sides of the binocular, and pull them apart or push them together while looking through the binocular to adjust the eyepiece spacing until your view is a single circular image.
Taking Still Photos After following the initial setup as described in the previous pages, you are ready to take a photo: 1. 2. 3. 4. 5. 6. Raise the LCD and press the POWER button briefly (red LED lights, Bushnell logo screen appears, then display goes black). Press the Display button to turn on the LCD again if you want to see a preview of the “live” image or check menu settings, battery condition, etc via the display icons.
7. Press the View button if you wish to check the photo after you take it, then press it again to return to a live preview. See the section “Review Mode” section for more detail about reviewing and deleting previously taken photos. Warning: Use care during handling to avoid touching the camera lens (located front center between the binocular lenses) to prevent degrading the image quality. Clean the camera lens only with dry lens tissue or microfiber cloth. DO NOT use liquids of any type.
Using The Main Menu-Options and Settings As mentioned earlier in this manual, your ImageView is already set for high resolution and quality right out of the box. Exposure, white balance, and other variables are set automatically. This means that you will get good results for most subjects and lighting without the need to go into the menus and change any settings.
Main Menu-Options and Settings Option Settings Description Image Quality Best, Better, Standard Sets the amount of file compression, which affects the quality of the photo and the size of the file it creates. This can be used independently of Image Size to help store more photos in exchange for slightly reduced quality. “Best” produces the highest quality, but also generates larger files that fill available memory sooner (fewer photos possible). EV -2.0 ~ +2.
Main Menu-Options and Settings Option Settings Description Language English, Spanish, Italian, French, German Selects your preferred language for all menu display screens. Auto Off 60 Seconds, 120 Seconds, Cancel Sets the interval after the last action (pressing any button) before the camera turns off to conserve battery power. Select “Cancel” to prevent auto shutoff altogether. Use the Arrow keys to set (in order) the Year, Month, Date, (2nd row) Hour, and Minute. Press MENU when done.
Additional Features From the “live” preview display (not the main menu), press the Right arrow key to select/cycle through these additional camera features (a fourth press will return to the preview display again): Feature Icon Description Self Timer Clock (white) Photo is taken after a 10 second delay when the SNAP button is pressed. With the ImageView mounted on a tripod, this can help prevent blur caused by jarring the camera when SNAP is pressed.
Review Mode -Viewing and Deleting Photos Using the Review Menu Press View to enter Review mode. Use the Left arrow key to go back through the stored photos/videos. Press SNAP to playback a video (indicated by AVI at top left of display). Once you are in review mode, pressing the MENU button will enter the review menu.
System Requirements OS: Windows® 2000/ME/XP/Vista/Windows 7 or Mac OS 9/OS X Internal USB Port Downloading the Photos & Videos to Your PC 1. 2. 3. 4. 5. Turn on the Imageview’s power. Connect the supplied cable to the ImageView’s USB port, then directly to a main USB port on your computer-do not use front panel/keyboard USB ports or unpowered “hubs”. The LCD display will indicate “Mass Storage”, and the ImageView will be recognized as a standard “USB Mass Storage” device.
Downloading the Photos & Videos to Your PC 6. 7. You’re now ready to open the photo files in any photo editing software. Just go to the folder where you stored the photos earlier and select File>Open. It is also possible to open and work with your photos directly from the ImageView while it is still connected. If you choose to work this way, from a connected camera, be sure that you save the photo (when finished editing) to your hard drive, and not the camera’s memory or card.
Technical Specifications Magnification 8x Sensor Type CMOS Objective Diameter 30mm Sensor Resolution 3.2 Megapixels Exit Pupil 3.75mm Effective Resolution Settings 8MP*, 5MP*, 3MP (default setting), 2MP, 0.
TWO-Year LIMITED WARRANTY Your Bushnell product is warranted to be free of defects in materials and workmanship for two years after the date of purchase. In the event of a defect under this warranty, we will, at our option, repair or replace the product, provided that you return the product postage prepaid. This warranty does not cover damages caused by misuse, improper handling, installation, or maintenance provided by someone other than a Bushnell Authorized Service Department.
For further questions or additional information please contact: Bushnell Outdoor Products 9200 Cody, Overland Park, Kansas 66214 (800) 423-3537 • www.bushnell.