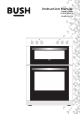
Instruction Manual Double Oven DHBDFBL60W DHBDFBL60B
You’ll soon be enjoying your new Cooker. It all begins here, with your instructions. Don’t worry, there’s nothing too technical coming up. Just simple, step-by-step guidance to get you up and running quickly. Sound good? Then let’s get started. Help and Guidance We’re here to help you get the most from your Cooker. Should you require any guidance, a simple solution can often be found online at: www.bush-support.co.uk If you still require further assistance, call one of our experts on 0345 257 7271.
Contents 1 Safety information 2 3 4 5 6 Safety information 6 7 Getting to know your cooker Ready? Let’s begin 12 Product features 13 Control panel 13 Installing your cooker Installatıon and preparatıon for use 16 Electrical connection and safety 19 Anti-tilting kit 20 Adjusting the feet 21 Care and Maintenance Cleaning 36 Maintenance 37 Product support Troubleshooting 40 Transport 40 Help and assistance 41 Information about transportation 42 Disposal 42 Guarantee 43 Fun
Safety information 1
Safety information Important - Please read these instructions fully before installing or operating • • Carefully read all instructions before using your appliance and keep them in a convenient place for reference when necessary. This manual has been prepared for more than one model therefore your appliance may not have some of the features described within. For this reason, it is important to pay particular attention to any figures whilst reading the operating manual. installed.
Safety information Important - Please read these instructions fully before installing or operating device. It should be installed and connected in accordance with current installation regulations. Particular attention shall be given to the relevant requirements regarding ventilation. • If the burner has not lit after 15 seconds, stop operating the device and open the compartment door. Wait at least 1 minute before attempting to ignite the burner again.
Safety information Important - Please read these instructions fully before installing or operating valve off when gas appliances are not in use. • Make sure the appliance control knobs are always in the “0” (stop) position when the appliance is not in use. • The trays incline when pulled out. Take care not to spill or drop hot food when removing it from the oven.
Safety information Important - Please read these instructions fully before installing or operating or online at www.bush-support.com If you still require further assistance, call one of our experts on 0345 257 7271.
Getting to know your cooker 2
Getting to know your cooker You’ll be up and running in no time Ready? Let’s begin... Please read these instructions carefully. They contain important information which will help you get the best from your Cooker and ensure safe and correct installation and operation. If you require any further assistance, our technical experts are happy to help. For full details, refer to the product support section at the end of these instructions.
Getting to know your cooker You’ll be up and running in no time List of components Product features Important: Specifications for the product vary and the appearance of your appliance may differ from that shown in the figures below. 1 2 3 Accessorries 4 5 The Deep Tray, Wire Grid and Handle Set 6 The Wire Grid 7 1. Cooktop 2. Control Panel 3. Top Oven Door Handle 4. Top Oven Door 5. Main Oven Door Handle 6. Main Oven Door 7. Adjustable Feet Control panel 11 9.
Installing your cooker 3
Installing your cooker Bringing it all together Installatıon and preparatıon for use WARNING : This appliance must be installed by an authorised service person or qualified technician, according to the instructions in this guide and in compliance with the current local regulations. • Prior to installation, ensure that the local distribution conditions (electricity voltage and frequency and/ or nature of the gas and gas pressure) and the adjustments of the appliance are compatible.
Installing your cooker Bringing it all together curtains, oil, cloth etc. which may catch fire. • the kitchen furniture must be at least 10 cm away from the sides of appliance for air circulation. The worktop and furniture surrounding the appliance must be made of materials resistant to temperatures above 100°C. • The appliance should not be installed directly above a dishwasher, fridge, freezer, washing machine or clothes dryer.
Installing your cooker Bringing it all together Points that must be checked during flexible hose assembly: • If the gas connection is made by a flexible hose fixed onto the gas inlet of the hob, it must be fixed on by a pipe collar. • Connect your appliance with a short and durable hose that is as close as possible to the gas source. produced. The main country of destination is marked on the rear cover of the appliance.
Installing your cooker Bringing it all together gas leaks. Gas Conversion (if available) Your appliance is designed to be operated with LPG/ NG gas. The gas burners can be adapted to different types of gas, by replacing the corresponding injectors and adjusting the minimum flame length suitable to the gas in use. For this purpose, the following steps should be performed. Changing injectors Hob burners • Cut off the main gas supply and unplug the appliance from the mains electrical supply.
Installing your cooker Bringing it all together current local regulations. WARNING: THE APPLIANCE MUST BE EARTHED. • For this connection, a ‘Twin and Earth 6242Y’ type cable should be used.
Installing your cooker Bringing it all together Adjusting the feet A Your product stands on four adjustable feet. For safe operation, it is important that your appliance is correctly balanced. Make sure the appliance is level prior to cooking. To increase the height of the appliance, turn the feet anti-clockwise. To decrease the height of the appliance, turn the feet clockwise. Wall Antitilting bracket It is possible to raise the height of the appliance up to 30 mm by adjusting the feet.
Functions 4
Functions Simple everyday use Hob controls Use of Gas Burners Ignition of the Burners The position symbol above each control knob indicates the burner that the knob controls. Manual ignition of the gas burners If your appliance is not equipped with an ignition aid, or in case there is a failure in the electric network, follow the procedures listed below.
Functions Simple everyday use • After use, the hob remains very hot for a prolonged period of time. Do not touch it and do not place any object on top of it. • Never place knives, forks, spoons and lids on the hob as they will get hot and could cause serious burns. • Do not allow pan handles or any other cooking utensils to project over the edge of the cooker top.
Functions Simple everyday use lights will switch on, and the ring heating element and fan will start operating. The temperature can be adjusted using the main oven function control knob. The turbo function evenly disperses the heat in the oven so all food on all racks will cook evenly. It is recommended that you preheat the oven for 10 minutes. Top oven functions * The functions available on your oven may differ from those listed below depending on the model purchased.
Functions Simple everyday use or online at www.bush-support.com If you still require further assistance, call one of our experts on 0345 257 7271.
Using your cooker 5
Using your cooker Getting the most from your appliance Accessorries The deep tray, wire grid and handle set The grill pan set is best used for grilling steaks and similar foods. WARNING: The grill pan has a detachable handle. Make sure when using the grill pan handle that it is centralised and secure, as shown in the figure below. Use two hands to hold the grill pan handle. Do not leave the handle in position while grilling is in operation.
Using your cooker Getting the most from your appliance Energy fiche Brand DHBDFBL60W DHBDFBL60B Model Type of Oven Mass ELECTRIC kg Upper Cavity Energy Efficiency Index - fan forced - Energy Class A Energy consumption (electricity) - conventional kWh/cycle 0,74 Energy consumption (electricity) - fan forced kWh/cycle - Heat Source Volume ELECTRIC l 36 Energy Efficiency Index - conventional Lower Cavity 49,0+/-2) 105,5 Energy Efficiency Index - conventional 94,5 Energy Efficiency Index
Using your cooker Getting the most from your appliance Brand DHBDFBL60W DHBDFBL60B Model Type of Hob Gas Number of Cooking Zones 4 Heating Technology-1 Size-1 Gas cm Energy Efficiency-1 % Heating Technology-2 Auxiliary NA Gas Size-2 Semi-Rapid Energy Efficiency-2 % Heating Technology-3 Size-3 Energy Efficiency-3 59,0 Gas cm Semi-Rapid % 59,0 Heating Technology-4 Gas Size-4 Rapid Energy Efficiency-4 % 57,0 Energy Efficiency of Hob % 58,3 This hob complies with EN 30-2-1 Energ
Using your cooker Getting the most from your appliance G30/31 28-30/37 mbar 7,5 kW 545 g/h II2H3+ GB Class: 1 NG G20 20 mbar LPG G30/G31 28-30/37 mbar DIA. of INJECTOR (1/100mm) 115 85 NOMINAL RATING (kW) 2,9 3 276 l/h 218,1 g/h 97 65 LARGE BURNER CONSUMPTION MEDIUM BURNER DIA. of INJECTOR (1/100mm) NOMINAL RATING (kW) CONSUMPTION 1,75 1,75 166.7 l/h 127,2 g/h 97 65 MEDIUM BURNER DIA. of INJECTOR (1/100mm) NOMINAL RATING (kW) CONSUMPTION 1,75 1,75 166.
Care and maintenance 6
Care and maintenance Looking after your appliance hob burners. Cleaning WARNING: Switch off the appliance and allow it to cool before cleaning is to be carried out. General Instructions • • Check whether the cleaning materials are appropriate and recommended by the manufacturer before use on your appliance. Use cream cleaners or liquid cleaners which do not contain particles.
Care and maintenance Looking after your appliance a regular basis. • Wipe the stainless steel parts with a soft cloth soaked in only water. Then, dry them thoroughly with a dry cloth. Do not clean the stainless steel parts while they are still hot from cooking. Do not leave vinegar, coffee, milk, salt, water, lemon or tomato juice on the stainless steel for a long time. Removal of the oven door Before cleaning the oven door glass, you must remove the oven door, as shown below. 1. Open the oven door.
Product support 7
Product support Help is always at hand Troubleshooting If you still have a problem with your appliance after checking these basic troubleshooting steps, please contact an authorised service person or qualified technician. Problem Possible Cause Solution Hob burners do not work. The burners may be in the ´off` position. Supply gas pressure may not be correct. Power (if the appliance has an electric connection) is switched off. Check the position of the control knob.
Product support Help is always at hand Help and assistance If you require any technical guidance or find that your oven is not operating as intended, a simple solution can often be found in the Troubleshooting section of these instructions or online at www.bush-support.com If you still require further assistance, call one of our experts on 0345 257 7271.
Product support Help is always at hand Information about transportation Disposal Keep the original packaging materials in a safe place. Transport the product by using its original packaging. Follow the instructions that are printed on the packaging. If you do not have the original packaging materials, take the necessary precautions in order to prevent the exterior panels, and the glass surfaces of the product from being damaged.
Product support Help is always at hand Call us now and activate your 12 month guarantee Thank you for choosing Bush. Your new product is guaranteed against faults and breakdowns for 12 months. Don’t forget to register it with us today so we can provide you with our best possible after-sales service and useful updates. www.bushregistration.co.uk FREEPHONE* 0800 597 8548 Lines are open 8am - 8pm, 365 days a year. *Calls may be recorded and monitored.
Contact: www.bush-support.