User's Manual Part 1

page
18
section 06
40040005 rev. 000
Step 2. Position the patient as described in Section 06-III of this manual.
Step 3. Click Start Test to begin testing.
Step 4. Once the test is completed, a pain scale will appear. Ask the patient to rate
his/her pain on a ten-point scale (0 is equivalent to no pain and 10 is equivalent to the
worst pain possible). Click on the number the patient determined and then click OK.
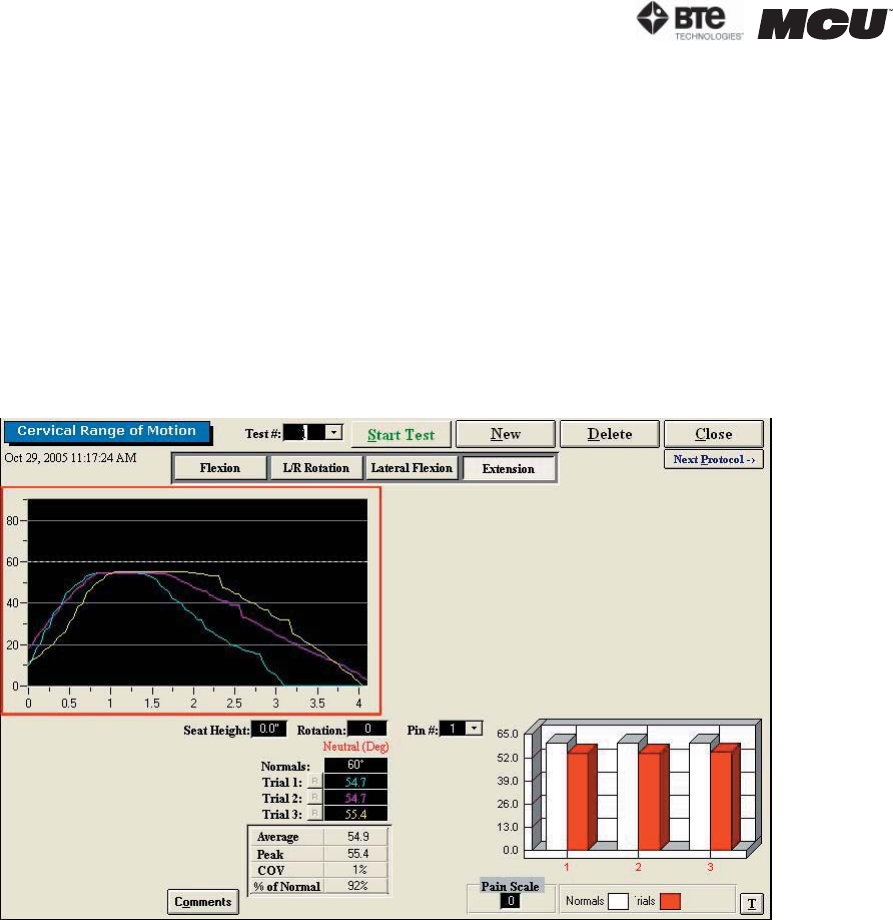
The ROM Extension test calls for three trials to be performed.
As the protocol is performed, the screen will display the results and averages via a line
graph, table, pie chart, and bar graph.
In addition to the test results, the screen will tabulate: the average ROM, peak ROM,
coefficient of variation (COV), and the percent of normal. The pain rating determined by
the patient will also appear in the pain scale text field (Figure 6-32).
You may retest a trial by clicking on the R icon to the left or right of the trial table, de-
pending on which trial you would like to redo. However, once a test has been closed, the
trials can not be retested.
IV. STRENGTH PROTOCOLS
A. POSITIONING THE PATIENT FOR NEUTRAL CERVICAL ISOMETRIC STRENGTH PRO-
TOCOLS
In order to prepare for cervical strength testing, it is extremely important to understand
how to properly position the patient; this will prevent any injury during testing.
The following 7 steps are required prior to each type of strength testing. Outlined after
these 7 initial steps are the subsequent steps, which vary according to the test being per-
formed.
Step 1. Insert the range-of-motion stop pin in the zero degree position on the halo (Figure
6-33).
Figure 6-32. Cervical ROM - Completed Extension Test


