User's Manual Part 1

page
4
section 06
40040005 rev. 000
B. EDITING AND CREATING SELF REPORTS
Access the pre-programmed Self Reports protocols by clicking the Self Reports icon on the
Home Screen.
This will bring you to the Self Reports Protocols main page, where you can edit and create
tests.
Edit a test by highlighting the test you would like to edit in the left box and clicking Edit
Test.
Create a new test by clicking on New Test.
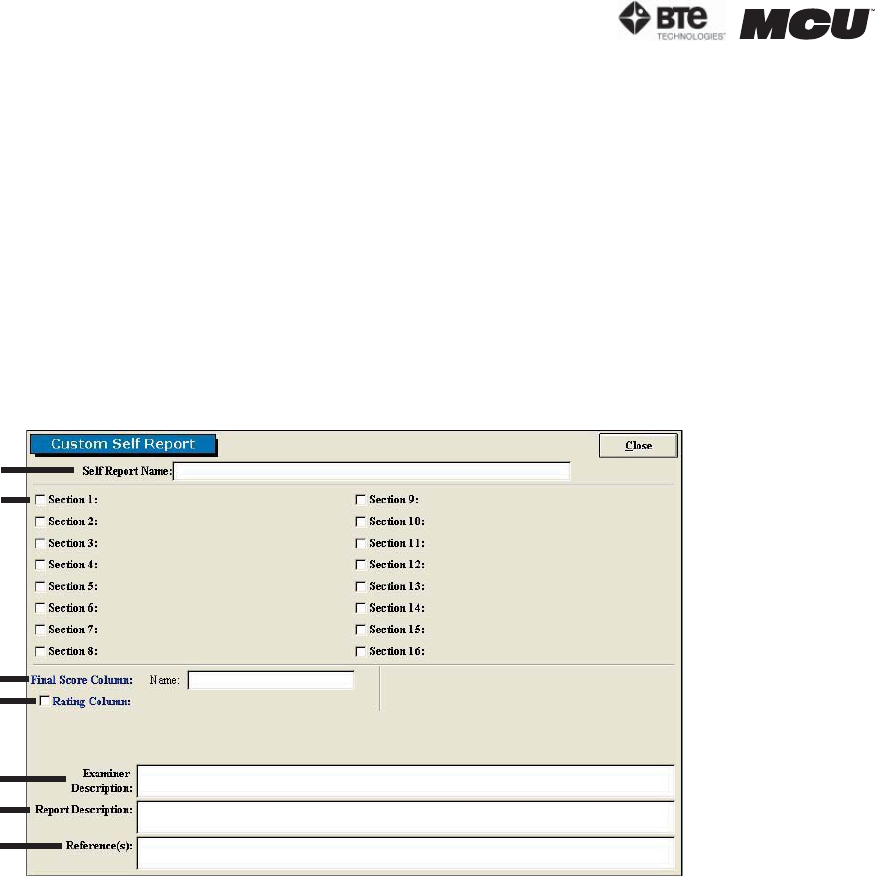
If you are editing a test, a screen will appear with the current settings of the test you
selected. If you are creating a test, a screen will appear with the same headings as if you
were editing a test, but all of the text fields will be blank (Figure 6-2).
Since editing and creating protocols are very similar, an example of an edited test will be
given, but the same guidelines apply for creating a test.The following can typically be ed-
ited or created on Custom Self Report Tests:
A. Test Name - Type in the name of the test
B. Section - Type in the sections to include in the test
C. Final Score Column Name - Type in the name of the final score column
D. Rating Column - Select whether to include a rating column and then type in the name of
the column
E. Examiner Description - Type in any description the examiner will need to perform the
test - this field is especially useful for supplying instructions on how to perform the evalu-
ation
F. Report Description - Type in any description that should be included on the report
G. Reference Information - Include any reference information that needs to be added to
the report
Once the screen has been closed, the protocol is saved under the assigned test name with
Figure 6-2. Custom Self Report
A
B
C
D
E
F
G


