User's Manual Part 1

page
8
section 05
40040005 rev. 000
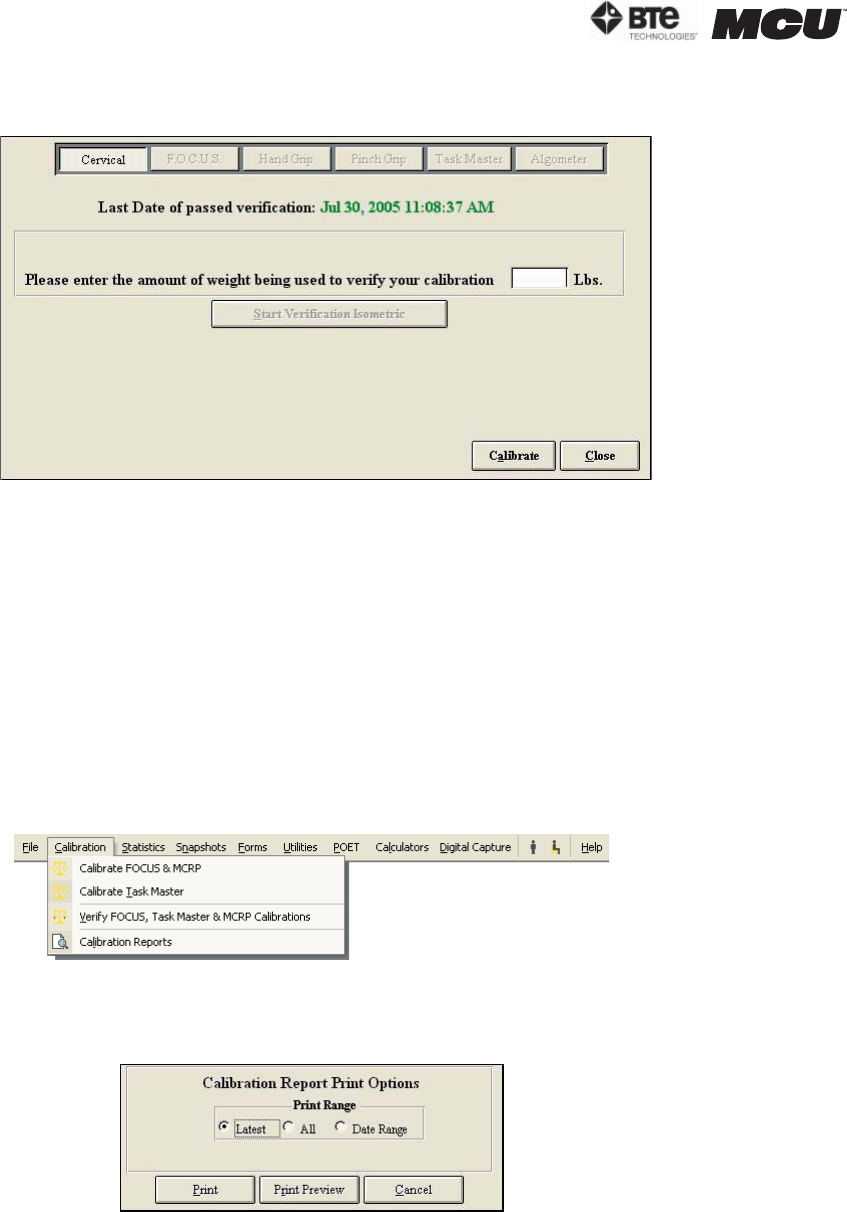
Select the Cervical icon from the main verification screen to bring up the MCU™ verification
screen (Figure 5-15).
The screen will always indicate the last day of successful verification.
The verification tools and process are the same as calibration. However, you must make sure
to use a different amount of weight for the verification than you did for the calibration.
Lastly, remember to include the weight of the calibration fixture, which is 0.7lb.
Once the device has been successfully verified, a screen will appear requesting the name of
the individual who just completed the calibration. In addition, the verification screen will show
the weight that you entered compared to the weight that the software calculated.
IV. CALIBRATION REPORTS
To print or view the calibration and verification reports, go to the Calibration menu within the
taskbar and then Calibration Reports (Figure 5-16).
You may filter the calibration report according to latest calibration, all calibrations, or date
range (Figure 5-17).
Print a report by clicking Print.
View a report by clicking Print Preview.
Figure 5-15. Cervical Verification Screen
Figure 5-16. Calibration Drop-Down Menu
Figure 5-17. Calibration Report Options Menu


