
Installation guide


Chapter 7: Plug In and Setup 48
Wireless Keypads
The advantage of wireless keypads is they allow you to have greater flexibility as to where they are located,
they are also advantageous in situations where there is no cable conduit to the bowler’s score table. However you
will occasionally need to change the batteries in order for them to continue to operate.
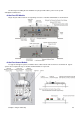
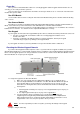
For all wireless keypads, either single or dual, you must first verify that the jumper for JP2 and JP3 are set to
the RIGHT. This will disconnect the LLAN communications drivers on the PC Board and hence improve battery life.
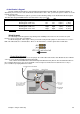
When the power is first supplied to the keypad PC Board, the keypad will beep three times to indicate that it
has performed its self test ok.
If it does not beep at all, check that the cable is correctly plugged in and there are no
breaks in the cable. Also check that your batteries are properly inserted and fully charged.
If it beeps a fourth time, this indicates that a key is being held down, either by the keypad surround
being too tight, or by damage to the keypad switch.
Single Wireless Keypads
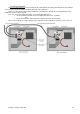
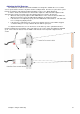
If you have a single keypad that will be used to wirelessly control BOTH lanes in the pair, then you must first set
the Channel Number on both the Rotary DIP switches to 04. (Zero on the 10’s switch and Zero on the 1’s switch)
Once this is done, the keypad will send out a signal to the Duo CPU module whenever a key is pressed, without
specifying Odd or Even Lane.
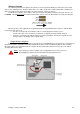
Note: If you change the channel number on the Keypad PCB, then you must re-boot it
by unplugging the cable from the LLAN IN port and then plug it back in.