
Installation guide
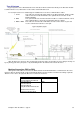


Chapter 3: Mount the Bowler’s Keypad Console 38
&KDSWHU 0RXQWWKH%RZOHU¶V.H\SDGFRQVROH
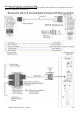
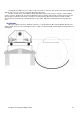
The Bowler’s Keypad console must be secured to the floor very tightly, as this unit often must adsorb a large
amount of abuse from the public. Even when properly secured, it is necessary to periodically check to make sure that
all fittings are still tight. Vandals will exploit any looseness or slack and may result in damage to the pedestal base or
the floor itself.
If you are intending to use the optional hard wired cable for communication between the keypad and the Duo
CPU Module, then make sure you have run this cable from the Duo Camera Module’s LLAN Out port, along the ball
track, past the ball return to the keypad’s location. Thread this cable through the steel pedestal base before securing
the base to the floor. If you are going to use the wireless connection option instead, then there is no need to run the
cable and the keypad can be secured at any location.
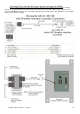
Concrete Floors
For concrete floors, make sure that the floor is level and there is no extra concrete around the conduit. The
Bowler’s console should be able to sit flat on the floor without rocking.
Drill the correct size hole in the concrete and use a concrete anchor bolt, or Tiger Bolt, to secure the console to
the floor.
Timber Floors
For timber floors use a hex drive self-drilling screw to secure the Bowler’s Console to the floor. Make sure you
use fresh holes to ensure that the screws bite into the timber flooring well.
Warning: Eye Protection, Ear Protection and a Dust Mask must be worn.
Note: Take care to ensure the SKC cable is not pinched or damaged when
securing the keypad console.