KEEP THIS RECORD FOR FUTURE REFERENCE Browning Model Serial Number Caliber Purchase Price Purchased From Date of Purchase Please fill out and mail the Market Survey Card at the back of the booklet. Printed in USA • PP890 73.
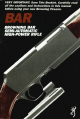
We are pleased that you have chosen a Browning BAR Rifle. In its manufacture, we have endeavored to incorporate the very finest in materials and craftsmanship, and with just reasonable care, this gun should provide you with many years of pleasure and dependable service. Please feel free to write us immediately if you have any observations regarding its performance and operation. Also please take a moment to complete and mail in the brief attached marketing survey card found on our back cover.
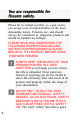
Please let us remind you that, as a gun owner, you accept a set of responsibilities of the most demanding nature. Firearms are, and should always be considered as, dangerous products and should be handled accordingly. PLEASE READ AND UNDERSTAND THE FOLLOWING PROPER HANDLING AND INSTRUCTION PROCEDURES OUTLINED BELOW IN THIS BOOKLET BEFORE USING YOUR NEW FIREARM. ALWAYS KEEP THE MUZZLE OF YOUR FIREARM POINTED IN A SAFE DIRECTION even though you are certain the rifle is unloaded.
blocking or disengaging mechanism for the trigger, sear, hammer and/or firing pin. Although mechanical devices place your gun in a SAFER status, no guarantee can be made that the gun will not fire even if the “safety” is in the “on safe” position. Safe gun handling does not stop with your gun’s mechanical “safety” devices. It starts there. Always treat your firearm with the respect due a loaded, ready-to-fire gun.
up and down from the stand. Always make certain that your firearm is not dropped from the stand, or dropped while it is being taken up or down from the stand. Remember, a loaded firearm may discharge when dropped, even with the safety on. BEWARE OF BARREL OBSTRUCTIONS for the safety of both your gun and yourself. Mud, snow, and an infinite variety of other objects may inadvertently lodge in a barrel bore.
ALWAYS UNLOAD YOUR GUN WHEN NOT IN USE. Your responsibilities do not end when your firearm is unattended. Store your gun and ammunition separately and well beyond the reach of children. Take all safeguards to insure your gun does not become available to untrained, inexperienced, or unwelcomed hands. USE THE PROPER AMMUNITION. The barrel and action of this rifle have been made with substantial safety margins over the pressures developed by established American commercial loads.
obstruction does not remain in the barrel. Completely empty the barrel before loading and firing again. EXAMINE EVERY CARTRIDGE YOU PUT IN YOUR GUN. Browning cannot assume any responsibility through the use of unsafe or improper arms and ammunition combinations. It is your responsibility to read and heed all warnings including those that appear in the instruction manual and on ammunition boxes and to secure the most up-to-dateinformation on the safe handling procedures for your Browning gun.
DROPPING A LOADED GUN MAY CAUSE AN ACCIDENTAL DISCHARGE EVEN WITH THE SAFETY IN THE “ON SAFE” POSITION. Although safety mechanisms are designed to make a gun safer, the owner or user should be extremely careful while hunting or during any shooting activity, to avoid dropping a loaded firearm. ALWAYS UNLOAD YOUR FIREARM’S CHAMBER BEFORE CROSSING A FENCE, CLIMBING A TREE, JUMPING A DlTCH OR NEGOTIATING OTHER OBSTACLES.
by a qualified gunsmith and the cause of the malfunction should be corrected before further use. WEAR EYE AND EAR PROTECTION WHEN SHOOTING. Unprotected, repeated exposure to gunfire can cause hearing damage. Wear ear protectors (shooting ear plugs or muffs) to guard against such damage. Wear shooting glasses to protect your eyes from flying particles.
BEFORE OR DURING SHOOTING. Your vision and judgement could be dangerously impaired, making your gun handling unsafe to you or to others. READ AND HEED ALL WARNINGS in this instruction book and on ammunition boxes. It is your responsibility to secure the most up-to-date information on the safe handling procedures for your Browning gun. Browning cannot assume any responsibility when unsafe or improper arms and ammunition combinations are used. PERIODIC MAINTENANCE— UNAUTHORIZED SERVICING.
In conventional gun terminology the position and movement of gun parts are described as they occur with the gun horizontal and in normal firing position; i.e., the muzzle is forward or in front; the buttstock is rearward or to the rear; the trigger is downward or underneath; the sights are upward or on top.
Your new Browning is a gas operated, semiautomatic repeating rifle. With cartridges in the magazine and the chamber and the safety in the OFF SAFE or FIRE position, the rifle will fire a single round with each successive pull of the trigger until the magazine and chamber are empty. When the last round has been fired, the bolt will be held in its rearward, or open, position by the magazine follower.
trigger. (See Figure 2) This is an ideal location for easy manipulation of the large safety head with the index finger of either hand. 12 With the safety pushed completely to the right the rifle is ON SAFE and rearward movement of the trigger is completely blocked. With safety pushed completely to the left the rifle is OFF SAFE and ready to fire. In this FIRE or OFF SAFE position a band of RED is visible on the safety where it projects beyond the left face of the trigger guard.
should be ON SAFE until it is ready to be fired. Note: If a left hand safety is installed these directions are reversed; i.e. the safety is pushed to the left to place the rifle ON SAFE and to the right to place the rifle OFF SAFE. CAUTION: Keep your fingers clear of the ejection port at all times when the bolt is locked open. The bolt will close with considerable force, if you should depress the magazine follower. The Browning semi-automatic high power rifle utilizes a unique detachable box magazine.
In the event the bolt is in its open position, a slightly different technique may be used to swing the magazine open and close the bolt at approximately the same time. Again, the first step is to insure that the safety is in its ON SAFE position. Next, hold the rifle with the muzzle pointed in a safe direction, with the left hand at forearm, as described before.
At this point, allow the bolt to move forward to its closed position. A left handed shooter may hold the rifle as described above with his right hand at the forearm and the left thumb over the top of the receiver, hooking the operating handle and pulling it slightly to the rear, while the left index finger releases the magazine latch.
for loading as described in the preceding paragraph. However, when loading the chamber, the bolt should be allowed to slam closed from its open position. If the bolt is not allowed to close in this manner, there is the possibility that it will not close completely, in which event the rifle will not fire. If this should ever happen, merely push the operating handle completely forward with the thumb or heel of your hand. Many sportsmen prefer to hunt with an empty chamber until in the presence of game.
may be occasions when you will want to load or replenish the magazine while a round is chambered. Next, hold the rifle in a safe barrel down position, using either hand on the forearm. Each cartridge should then be carefully inserted into the magazine against the pressure of the spring loaded follower, until it is retained by the metal rims of the magazine body. Care should be exercised in positioning each cartridge so that its base is to the rear of the magazine.
Once again, place the rifle ON SAFE and be sure the muzzle is pointed in a safe direction. With the magazine-floorplate unit open the magazine may be detached by merely pulling it away from the hinged floorplate. To do so, grasp the sides of the magazine toward its rear with the thumb and middle finger of either hand. Then, pull the magazine away from the floorplate while at the same time bearing against the projecting rear of the floorplate with the index finger.
hand at the forearm. Once the magazine is detached it may be loaded with cartridges as described earlier. To reattach, insert the small lip on the front face of the magazine into the matching groove in the forward end of the floorplate. Then snap the rear of the magazine firmly into place. Extra magazines may be carried loaded for rapid replacement of an empty magazine, using this same procedure. After loading the magazine, it is swung upward into place until retained by the magazine latch.
cartridges may be stripped from it with the thumb of either hand. As is always good safety practice, visually inspect the chamber to be absolutely sure a round is not still present. Once this is determined the bolt may be allowed to close. To unload the magazine merely push forward on the base of each round until it clears the retaining rims. The last step is to close the floorplate either without the magazine or with an empty magazine in place. The BAR is available with or without open sights.
not drop sufficiently to exclude an effective shot over an additional distance of approximately 50 yards. (See Figure 6) A zero at 200 yards, therefore, represents an optimum compromise sight setting for any distance up to 250 yards, since the bullet will not deviate sufficiently from the point of aim to miss the vital areas of big game animals found in North America.
Schematlc is provlded for parts identification only and should not be used as a guide to assemble guns. IMPORTANT: When ordering parts, list part number, part name, caliber, model and serial number. CAUTION: Browning parts are made exclusively for Browning guns and are not recommended for use in other guns even though models may bo similar Inadequately fitted parts may be dangerous.
Browning BAR Semi-Automatic High Power Rifle Standard Calibers—243 Win., 308 Win., 270 Win., 30-06 Sprg. Magnum Calibers—7 mm Rem Mag., 300 Win. Mag. If not specified-Fits All Calibers Parts list for High PART NO. PO76002 PO76006 PO76010 PO76016 PO76021 PO76026 PO76031 PO76033 PO76035 'PO76036 *PO76038 *PO76040 PO76045 PO76048 PO76052 PO76060 PO76062 PO76071 PO76077 Grade Rifles is available upon request. DESCRIPTION PART NO.
PART NO. DESCRIPTION PO76155 PO76160 PO76165 PO76167 PO76168 PO76169 PO76170 PO76175 PO76177 PO76178 PO76179 PO76180 PO76182 PO76184 PO76186 PO76188 PO76192 PO76193 PO76194 PO76196 PO76146 PO76149 PO76150 PO76152 PO76197 PO76198 PO76202 PO76204 PO76205 PO76206 Inertia Piece Magazine Complete, 243 Win., 308 Win. Magazine Complete, 270 Win., 30-06Sprg. Magazine Complete, 7 mm Rem. Mag. Magazine Complete 300 Win. Mag. Magazine Complete, 338 Win. Mag. Magazine Body, 243 Win. 308 Win. 270 Win., 30-06 Sprg.
Caliber 308 Win. 308 Win. 308 Win. 308 Win. 7 mm Rem. Mag. 7 mm Rem. Mag. 7 mm Rem. Mag. 308 Win. Mag. 308 Win. Mag. 308 Win. Mag. Bullet Weight in Grains 110 125 150 180 125 150 175 150 180 220 Distance above aim point at 100yards* 2.2 2.3 2.6 3.1 1.1 1.5 1.7 1.9 2.1 2.9 *Approximate distance above point of aim for the path of the bullet at 100 yards when rifle is zeroed in at 200 yards.
Caliber 243 Win. 243 Win. 270 Win. 270 Win. 270 Win. 30-06 Sprg. 30-06 Sprg. 30-06 Sprg. 30-06 Sprg. 30-06 Sprg. Bullet weight in Grains 80 100 100 130 150 110 125 150 180 220 Distance above aim point at 100 yards* 1.8 2.2 1.8 2.1 2.5 2.2 2.2 2.5 3.0 3.
Place a target at the desired distance from the shooting point which will clearly show the impact of the bullet from a known point of aim. For this purpose a regular bullseye paper target is most suited. Shoot three or four shots at the target from a prone or sitting position using a rest under the forearm (not the barrel) and supporting the elbows to maintain the rifle in the steadiest manner possible.
telescopic sights. To adjust the BAR’s open rear sight proceed as follows: Always unload your rifle before making any alignment to the sights. If horizontal or windage correction is desired, slightly loosen the screw immediately in front of the rear sight notch. (This windage screw is set in a bright metal collar; the screw next to it is the vertical adjustment screw. Refer to Figure 7.) Slide the rear sight blade in the direction you wish the bullet impact to move.
If vertical correction is desired, loosen the vertical adjustment screw and slide the rear sight assembly along the inclined ramp of the sight base. Again calibration marks on the sight will reference movement, and similarly, each calibration mark represents approximately 4 inches at 100 yards. Just remember this simple rule in making rear sight adjustments. Always move your rear sight in the same direction you want the point of bullet impact to move.
your point of aim shown in the chart for the particular cartridge employed. When this is achieved, the bullet will strike the point of aim at 200 yards within ordinary limits of dispersion for such ammunition at that distance. The trigger mechanism has been adjusted at the factory to provide a short crisp pull, yet one consistent with safety. The trigger is a single stage design with the weight of pull holding closely to 4 pounds.
open position when the magazine is empty and in place. Using a rifle cleaning rod with tip and patch large enough for snug fit in bore, insert rod and patch in barrel from the muzzle end and run back and forth several times. Caution should be exercised to insure that the cleaning rod or handle does not strike the crown of the muzzle, as damage to this area can adversely affect the accuracy of the rifle. Inspect the chamber and bore for powder fouling.
The bolt and interior of the receiver should be wiped off with a clean rag. This is best done with the magazine floorplate open and the bolt in its closed position; and also with the magazine floorplate open and the bolt held to the rear by hand. Any dried oil in these areas and on the magazine follower should be removed. Follow this cleaning by applying a very light film of oil on the affected parts. Do not, however, pour large quantities of oil into the action.
a season is adequate, preferably at the end of the season. The following procedure should be followed: BE CERTAIN THE RIFLE IS UNLOADED. With the rifle in the “On Safe” position and pointed in a safe downward direction, release the magazine floorplate to its open position. Grasp the bolt operating handle and move it smartly to the rear, thereby extracting and ejecting any live round in the chamber. Detach the magazine clip from the hinged floorplate.
forearm must be pulled away from the barrel so that the forearm will clear the bottom of the gas cylinder as the forearm is moved forward.) Note: The forearm cannot be removed unless the bolt is locked open. Remove action bars and support rails: Close the bolt and pull the support rails forward and remove completely from their slots in the interior of the receiver.
Remove gas regulator from the forward end of the gas cylinder: Turn in a counterclockwise direction. (See Figure 10) Use a 5/8' wrench for this operation. (Note: The gas regulator will be very securely tightened in the gas cylinder, and care must be taken to firmly engage wrench used for removal.) Remove the gas piston: The inertia block should be pulled back toward the receiver until rear face of the gas piston can be pushed forward out of the gas cylinder with a small drive punch.
gas piston may require forcefully moving the gas piston forward with a hammer and drive punch, and extreme care must be used to avoid scoring parts. If the gas piston will not move with moderate force, place a couple of drops of nitro-solvent around the gas piston, wait about 15 minutes, and then try to push the piston out with the drive punch. If the piston still will not move, put more nitrosolvent on the piston and allow it to set overnight before attempting to remove the piston.
gauge shotgun bronze wire bore brush and a good solvent. The gas piston, gas cylinder, and other parts covered by the forearm should be wiped with a very lightly oiled cloth after cleaning. The gas cylinder interior and the gas piston SHOULD NOT BE OILED beyond this. Reassembly is just the reverse of steps for disassembly. The action spring, action spring guide, and inertia block are replaced first.
gas cylinder and pushed rearward over the end of the action spring guide. Care must be taken to insure that the small guide pin at the rear of the gas cylinder is engaged in the lengthwise groove on the rear portion of the gas piston. To be sure that the gas piston is properly aligned in the gas cylinder, the gas piston should be able to be pushed partially out of the rear end of the gas cylinder when the inertia block is pulled away from the gas cylinder.
If your firearm should require service or repairs, we suggest you first contact a local recommended Browning Firearms Service Center. Your Browning Sporting Goods dealer can tell you the address of the Service Center nearest you, or you may call or write our Consumer Information Department: Browning Consumer Information Route One Morgan, Utah 84050 Phone: (801) 876-2711 Otherwise you may return your firearm to our own repair facility for servicing.
You Are Responsible For Firearms Safety As a gun owner, you accept a set of demanding responsibilities. How seriously you take these responsibilities can mean the difference between life and death. Failure to follow any of these instructions can cause extensive damage to your gun and/or possible serious injury or death to yourself and others. There is no excuse for careless or abusive handling of any firearm. At all times handle any firearm with intense respect for its power and potential danger.
6. BEWARE OF BARREL OBSTRUCTIONS, for the safety of both your gun and yourself. Mud, snow, and an infinite variety of other obstructions may inadvertently lodge in a barrel bore. It takes only one small obstruction to cause dangerously increased pressures that can ruin (swell or rupture) the finest rifle barrels. BEFORE CHECKING FOR A BARREL OBSTRUCTION, BE CERTAIN NO LIVE ROUND IS IN THE CHAMBER AND THAT THE MAGAZINE IS REMOVED AND FEED MECHANISMS ARE COMPLETELY EMPTY.
11. BE SURE OF YOUR TARGET AND BACKSTOP. Particularly during low light periods. Know the range of your ammunition. Never shoot at water or hard object. 12. ALWAYS UNLOAD YOUR RIFLE'S CHAMBER BEFORE CROSSING A FENCE, CLIMBING A TREE, JUMPING A DITCH OR NEGOTIATING OTHER OBSTACLES. Refer to "Unloading The Rifle" for instructions on the unloading of your rifle. Never place your loaded rifle on or against a fence, tree, car or other similar object. 13. WEAR EYE AND EAR PROTECTION WHEN SHOOTING.
20. READ AND HEED ALL WARNINGS in this instruction book, on ammunition boxes and with all accessories that you install on your firearm. It is your responsibility to secure the most up-to-date information on the safe handling procedures of your Browning gun. Browning assumes no liability for incidents which occur when unsafe or improper gun accessories or ammunition combinations are used. 21. PERIODIC MAINTENANCE -- AVOID UNAUTHORIZED SERVICING.
SPORTSMAN'S KNIVES There is a folding or fixed blade Browning knife to match nearly every requirement including fillet, pocket, skinning and general utility style knives. Every Browning knife is manufactured using the finest materials and the most hand-pleasing designs. Each Browning knife is distinctive in quality and style the way a good knife should be — FISHING TACKLE You'll catch more fish and have more fun with a quality Browning fishing rod or reel.
SPORTING ARMS World famous for handcrafted quality and dependability, Browning Sporting Arms include a complete line of shotguns and high power or small bore caliber rifles and pistols. BROWNING PROSTEEL GUN SAFES Protect your guns and other valuables from today's rising theft rate. No other safe gives you the protection you get from Browning Pro-Steel's Gold Series safes; reinforced door and door frame. extensive hard plate. heavy steel plate construction, and independent, active lacking lugs.
SPORTSMAN'S BOOT’S PACKS AND WADERS Browning boots are known for their comfort and long wear. They're built from the finest materials and leathers, with features like Dual-Waterproof™ construction found on all Nomad series Gore-Tex® boots A waterproof outer shell and inner Gore-Tex® bootie doubles your assurance of dry feet. You'll cover more ground with less effort wearing a pair of our famous lightweight boots.
SPORTSMAN'S CLOTHING Hunting, fishing, or treks to the shopping mall, you know that your Browning clothing will do its job well. For the sportsman who spends time in wet, cold weather, Browning has a complete line of waterproof Gore-Tex® clothing. Hats. gloves and handsome leather belts are also available. ARCHERY EQUIPMENT Browning has a complete line of compound bows suited for recreation and hunting.