
Multi-Protocol Print Server Network User's Guide


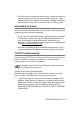

Table Of Contents
- Table of Contents
- 1 Unix Printing 1-1
- 2 TCP/IP Printing 2-1
- 3 Peer to Peer Printing 3-1
- 4 NetBIOS Peer to Peer Printing 4-1
- 5 Configuring Internet Printing for Windows® 5-1
- 6 Novell NetWare Printing 6-1
- 7 Printing From a Macintosh® 7-1
- 8 DLC Printing 8-1
- 9 Web Based Management 9-1
- 10 TCP/IP Configuration 10-1
- 11 Troubleshooting 11-1
- 12 Appendix A-1
- 13 INDEX 1-1
- IMPORTANT INFORMATION: REGULATIONS
- Unix Printing
- TCP/IP Printing
- Printing from Windows NT®4.0, Windows® 2000/XP, LAN Server and Warp Server
- Overview
- Windows NT®4.0 and Windows® 2000/XP (TCP/IP) Configuration
- Windows® 2000/XP Printing (Printer Driver not yet installed)
- Windows® 2000/XP Printing (Printer Driver already installed)
- Windows NT®4.0 Printing
- Windows NT®4.0 Printing: Installing the Brother Peer to Peer Software
- Windows NT®4.0 Printing: Associating to the Printer
- Windows NT®4.0 Printing: Adding a Second Brother LPR Port
- LAN Server, OS/2 Warp Server Configuration
- Other Sources of Information
- Printing from Windows NT®4.0, Windows® 2000/XP, LAN Server and Warp Server
- Peer to Peer Printing
- NetBIOS Peer to Peer Printing
- How to Print Using NetBIOS in Windows® 95/98/Me/2000/XP, Windows NT®4.0, LAN Server and OS/2 Warp Server
- Overview
- Print Server Configuration
- Changing the Workgroup/Domain Name Using TELNET or BRCONFIG or a Web Browser
- NetBIOS Port Monitor for Windows® 95/98/Me/ 2000/XP and Windows NT®4.0
- Installing the Brother NetBIOS Port Monitor
- Associating the Printer
- Adding a Second NetBIOS Print Port
- LAN Server/OS/2 Warp Server Configuration
- Other Sources of Information
- How to Print Using NetBIOS in Windows® 95/98/Me/2000/XP, Windows NT®4.0, LAN Server and OS/2 Warp Server
- Configuring Internet Printing for Windows®
- Internet Printing Installation
- Overview
- Brother Internet Print General Information
- Brother Internet Print: Configuring the Brother Print Server
- Brother Internet Print: Using BRAdmin to Configure the Print Server
- Brother Internet Print: Using a Web Browser to Configure the Print Server
- Brother Internet Print: Using TELNET to Configure the Print Server
- Brother Internet Print: Installing the BIP Software on Windows® 95/98/Me/2000/XP and Windows NT®4.0
- Adding a Second Brother Internet Port
- Windows® 2000/XP IPP Printing
- Specifying a Different URL
- Other Sources of Information
- Internet Printing Installation
- Novell NetWare Printing
- How to Configure Novell NetWare Printing
- Overview
- General Information
- Creating a NDPS Printer Using NWADMIN for NetWare5
- NDPS Manager
- NDPS Broker
- Creating a Printer Agent
- Configuring NetWare 3 and NetWare 4 Systems
- Configuring the Brother Print Server (Queue Server Mode in Bindery Emulation Mode) Using BRAdmin
- Configuring the Brother Print Server (Queue Server Mode in NDS mode) Using BRAdmin
- Configuring the Brother Print Server (Queue Server Mode in NDS Mode) Using Novell NWADMIN and BRAdmin
- Configuring the Brother Print Server (Remote Printer Mode in NDS mode) Using Novell NWAdmin and BRAdmin
- Configuring the Brother Print Server (Queue Server Mode in Bindery Emulation Mode) Using PCONSOLE and BRCONFIG
- Configuring the Brother Print Server (Queue Server Mode in NDS Mode) Using PCONSOLE and BRCONFIG
- Configuring the Brother Print Server (Remote Printer Mode) Using PCONSOLE and BRCONFIG
- Other Sources of Information
- How to Configure Novell NetWare Printing
- Printing From a Macintosh®
- DLC Printing
- Web Based Management
- TCP/IP Configuration
- Assigning TCP/IP Information
- Overview
- Using the Printer Control Panel to Allocate an IP Address (Printers with LCD Panels Only)
- Changing the IP Address Using the BRAdmin Application
- Using BRAdmin and the IPX/SPX Protocol to Set the IP Address
- Using BRAdmin and the TCP/IP Protocol to Set the IP Address
- Using DHCP to Configure the IP Address
- Using APIPA to Configure the IP Address
- Using ARP to Configure the Print Server IP Address
- Using RARP to Configure the IP Address
- Using BOOTP to Configure the IP Address
- Configuring the IP Address with BRCONFIG
- Changing the IP Address Settings with the TELNET Console
- Assigning TCP/IP Information
- Troubleshooting
- Overview
- Installation Problems
- Intermittent Problems
- TCP/IP Troubleshooting
- UNIX Troubleshooting
- Windows NT®4.0/LAN Server (TCP/IP) Troubleshooting
- Windows® 95/98/Me Peer to Peer Print (LPR) Troubleshooting
- Windows® 95/98/Me Peer-to-Peer (HP JetAdmin Compatible Method) Troubleshooting
- Windows® 95/98/Me and Windows NT®4.0 Peer-to- Peer Print (NetBIOS) Troubleshooting
- Brother Internet Print (TCP/IP) Troubleshooting
- Windows® 95/98/Me/2000/XP IPP Troubleshooting
- Novell NetWare Troubleshooting
- AppleTalk Troubleshooting
- DLC/LLC Troubleshooting
- Web Browser Troubleshooting (TCP/IP)
- Appendix
- INDEX
11 - 3 TROUBLESHOOTING
3
If you cannot make any of the connections in step 2, check the
following:
a
Make sure the printer is powered on and on-line.
b
Check the cabling, network connection, and print out a
configuration page in the Network STATISTICS information to
see if bytes are being transmitted and received.
c
Check to see if there is any LED activity.
Brother print servers have two LEDs on the back panel of the
printer. The upper side LED shows Link/Speed status. The
lower side LED shows Activity (Receive/Transmit) status.
■ No light:
If the both of two LEDs are off, then the print server is not
connected to the network.
■ Link/Speed LED is orange: Fast Ethernet
The Link/Speed LED will be orange if the print server is
connected to a 100BaseTX Fast Ethernet network.
■ Link/Speed LED is green: 10BaseT Ethernet
The Link/Speed LED will blink if the print server is receiving or
transmitting data.
4
If you are using a repeater or hub, make sure that SQE
(heartbeat) is turned off at the hub (if applicable). Also, if you
have a hub or multi-port repeater, verify that the hub or repeater
port is good by trying the print server on a different port or on the
other hub or multi-port repeater.
5
If you have a bridge or router located between the print server
and host computer, make sure that the device is set up to allow
the print server to send and receive data from the host. For
example, a bridge can be set up to only allow certain types of
Ethernet addresses to pass through (a process known as
filtering); therefore, such a bridge must be configured to allow
Brother print server addresses. Likewise, a router can be set up
to pass only certain protocols, so be sure that the desired
protocol can be passed through to the print server.