
Server User Manual

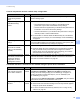
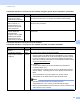
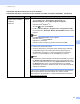
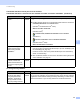
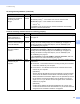
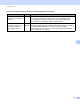
Table Of Contents
- Network User’s Guide
- Applicable models
- Definitions of notes
- IMPORTANT NOTE
- Table of Contents
- Section I: Network Operation
- 1 Introduction
- 2 Changing your machine’s network settings
- 3 Configuring your machine for a wireless network (For HL-5470DW(T) and HL-6180DW(T))
- Overview
- Confirm your network environment
- Wireless configuration temporarily using a USB cable (Recommended for Windows®)
- Configuration using the machine’s control panel Setup Wizard
- One push configuration using WPS (Wi-Fi Protected Setup) or AOSS™
- Configuration using the PIN Method of WPS (Wi-Fi Protected Setup)
- Configuration in Ad-hoc mode (For IEEE 802.11b)
- 4 Control panel setup
- Overview
- Network menu (For HL-5470DW(T) and HL-6180DW(T))
- Reset the network settings to the factory default
- Printing the Printer Settings Page (For HL-5450DN(T))
- Printing the Network Configuration Report (For HL-5470DW(T) and HL-6180DW(T))
- Printing the WLAN report (For HL-5470DW(T) and HL-6180DW(T))
- Function table and default factory settings
- 5 Web Based Management
- 6 Security features
- Overview
- Managing your network machine securely using SSL/TLS
- Secure Management using BRAdmin Professional 3 (Windows®)
- Printing documents securely using SSL/TLS
- Sending an E-mail securely
- Using IEEE 802.1x authentication
- Using Certificates for device security
- Managing multiple certificates
- 7 Troubleshooting
- Section II: Network Glossary
- 8 Types of network connections and protocols
- 9 Configuring your machine for a network
- 10 Wireless network terms and concepts (For HL-5470DW(T) and HL-6180DW(T))
- 11 Additional network settings from Windows®
- Types of additional network settings
- Installing drivers used for printing via Web Services (Windows Vista® and Windows® 7)
- Uninstalling drivers used for printing via Web Services (Windows Vista® and Windows® 7)
- Network printing installation for Infrastructure mode when using Vertical Pairing (Windows® 7)
- 12 Security terms and concepts
- Section III: Appendixes
- Index

81
Troubleshooting
7
Is your Brother machine
assigned with an available
IP address?
(continued)
wired/
wireless
1 (Windows
®
XP, Windows Server
®
2003/2008)
Click the Start button, All Programs, Accessories and
Windows Explorer, and then My Computer (Computer).
(Windows Vista
®
/Windows
®
7)
Click the button and Computer.
2 Double-click Local Disk (C:), Program Files or Program Files (x86)
for 64-bit OS users, Browny02, Brother, BrotherNetTool.exe to run the
program.
Note
If the User Account Control screen appears,
(Windows Vista
®
) Click Continue.
(Windows
®
7) Click Yes.
(Windows Server
®
2008) Type password and then click OK.
3 Follow the on-screen instructions.
4 Check the diagnosis by printing the Printer Settings Page or Network
Configuration Report. See Printing the Printer Settings Page (For
HL-5450DN(T)) uu page 41 or Printing the Network Configuration
Report (For HL-5470DW(T) and HL-6180DW(T)) uu page 41.
Note
The Network Connection Repair Tool will start automatically if you check
the Enable Connection Repair Tool box using Status Monitor. Right-
click on the Status Monitor screen, click Options, Details and then click
the Diagnostic tab. This is not recommended when your network
administrator has set the IP address to static, since it will automatically
change the IP address.
If the correct IP address and the Subnet mask are still not assigned even
after using the Network Connection Repair Tool, ask the network
administrator for this information, or visit the Brother Solutions Center at
http://solutions.brother.com/
.
The Brother machine cannot print over the network.
The Brother machine is not found on the network even after successful installation. (continued)
Question Interface Solution