
Server User Manual


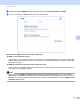
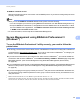
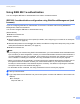
Table Of Contents
- Network User’s Guide
- Applicable models
- Definitions of notes
- IMPORTANT NOTE
- Table of Contents
- Section I: Network Operation
- 1 Introduction
- 2 Changing your machine’s network settings
- 3 Configuring your machine for a wireless network (For HL-5470DW(T) and HL-6180DW(T))
- Overview
- Confirm your network environment
- Wireless configuration temporarily using a USB cable (Recommended for Windows®)
- Configuration using the machine’s control panel Setup Wizard
- One push configuration using WPS (Wi-Fi Protected Setup) or AOSS™
- Configuration using the PIN Method of WPS (Wi-Fi Protected Setup)
- Configuration in Ad-hoc mode (For IEEE 802.11b)
- 4 Control panel setup
- Overview
- Network menu (For HL-5470DW(T) and HL-6180DW(T))
- Reset the network settings to the factory default
- Printing the Printer Settings Page (For HL-5450DN(T))
- Printing the Network Configuration Report (For HL-5470DW(T) and HL-6180DW(T))
- Printing the WLAN report (For HL-5470DW(T) and HL-6180DW(T))
- Function table and default factory settings
- 5 Web Based Management
- 6 Security features
- Overview
- Managing your network machine securely using SSL/TLS
- Secure Management using BRAdmin Professional 3 (Windows®)
- Printing documents securely using SSL/TLS
- Sending an E-mail securely
- Using IEEE 802.1x authentication
- Using Certificates for device security
- Managing multiple certificates
- 7 Troubleshooting
- Section II: Network Glossary
- 8 Types of network connections and protocols
- 9 Configuring your machine for a network
- 10 Wireless network terms and concepts (For HL-5470DW(T) and HL-6180DW(T))
- 11 Additional network settings from Windows®
- Types of additional network settings
- Installing drivers used for printing via Web Services (Windows Vista® and Windows® 7)
- Uninstalling drivers used for printing via Web Services (Windows Vista® and Windows® 7)
- Network printing installation for Infrastructure mode when using Vertical Pairing (Windows® 7)
- 12 Security terms and concepts
- Section III: Appendixes
- Index

64
Security features
6
Using IEEE 802.1x authentication 6
You can configure IEEE 802.1x authentication for a wired or a wireless network.
IEEE 802.1x authentication configuration using Web Based Management (web
browser) 6
If you are configuring IEEE 802.1x authentication for a wired or a wireless network using Web Based
Management, follow the instructions.
You can also configure IEEE 802.1x authentication using:
(Wired network)
BRAdmin Professional 3
(Wireless network)
Wireless setup wizard from the control panel (For details, see Configuring your machine for an enterprise
wireless network uu page 23.)
Wireless setup wizard on the CD-ROM (For details, see Wireless configuration temporarily using a USB
cable (Recommended for Windows
®
) uu page 12.)
BRAdmin Professional 3
Note
• If you configure your machine using EAP-TLS Authentication, you must install the Client Certificate issued
by a CA before you start configuration. Contact your network administrator about the Client Certificate. If
you have installed more than one certificate, we recommend you write down the certificate you want to
use. For details on installing the certificate, see Using Certificates for device security uu page 66.
• Before you verify the Server Certificate, you must import the CA certificate that has been issued by the CA
that signed the Server Certificate. Contact your network administrator or your ISP (Internet Service
Provider) to confirm whether a CA certificate import is necessary. For details on importing the certificate,
see Import and export a CA certificate uu page 77.
• For the details of each certificate, see Using Certificates for device security uu page 66.
a Start your web browser.
b Type “http://machine’s IP address/” into your browser (where “machine’s IP address” is the machine’s IP
address).
For example:
http://192.168.1.2/