
Server User Manual

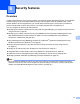

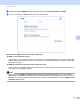
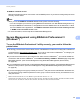
Table Of Contents
- Network User’s Guide
- Applicable models
- Definitions of notes
- IMPORTANT NOTE
- Table of Contents
- Section I: Network Operation
- 1 Introduction
- 2 Changing your machine’s network settings
- 3 Configuring your machine for a wireless network (For HL-5470DW(T) and HL-6180DW(T))
- Overview
- Confirm your network environment
- Wireless configuration temporarily using a USB cable (Recommended for Windows®)
- Configuration using the machine’s control panel Setup Wizard
- One push configuration using WPS (Wi-Fi Protected Setup) or AOSS™
- Configuration using the PIN Method of WPS (Wi-Fi Protected Setup)
- Configuration in Ad-hoc mode (For IEEE 802.11b)
- 4 Control panel setup
- Overview
- Network menu (For HL-5470DW(T) and HL-6180DW(T))
- Reset the network settings to the factory default
- Printing the Printer Settings Page (For HL-5450DN(T))
- Printing the Network Configuration Report (For HL-5470DW(T) and HL-6180DW(T))
- Printing the WLAN report (For HL-5470DW(T) and HL-6180DW(T))
- Function table and default factory settings
- 5 Web Based Management
- 6 Security features
- Overview
- Managing your network machine securely using SSL/TLS
- Secure Management using BRAdmin Professional 3 (Windows®)
- Printing documents securely using SSL/TLS
- Sending an E-mail securely
- Using IEEE 802.1x authentication
- Using Certificates for device security
- Managing multiple certificates
- 7 Troubleshooting
- Section II: Network Glossary
- 8 Types of network connections and protocols
- 9 Configuring your machine for a network
- 10 Wireless network terms and concepts (For HL-5470DW(T) and HL-6180DW(T))
- 11 Additional network settings from Windows®
- Types of additional network settings
- Installing drivers used for printing via Web Services (Windows Vista® and Windows® 7)
- Uninstalling drivers used for printing via Web Services (Windows Vista® and Windows® 7)
- Network printing installation for Infrastructure mode when using Vertical Pairing (Windows® 7)
- 12 Security terms and concepts
- Section III: Appendixes
- Index

62
Security features
6
Sending an E-mail securely 6
Configuration using Web Based Management (web browser) 6
You can configure secured E-mail sending with user authentication or E-mail sending using SSL/TLS on the
Web Based Management screen.
a Start your web browser.
b Type “http://machine’s IP address/” into your browser (where “machine’s IP address” is the machine’s IP
address).
For example:
http://192.168.1.2/
c No password is required by default. Enter a password if you have set one and press .
d Click Network.
e Click Protocol.
f Click Advanced Setting of POP3/SMTP and make sure that the status of POP3/SMTP is Enabled.
g You can configure the POP3/SMTP settings on this page.
Note
• For more information, see the Help text in Web Based Management.
• You can also confirm whether the E-mail settings are correct after configuration by sending a test E-mail.
• If you do not know the POP3/SMTP server settings, please contact your system administrator or ISP
(Internet Service Provider) for details.
h After configuring, click Submit. The Test E-mail Send Configuration dialog appears.
i Follow the instructions on-screen if you want to test with the current settings.
Sending an E-mail with user authentication 6
This machine supports POP before SMTP and SMTP-AUTH methods to send an E-mail via an E-mail server
that requires user authentication. These methods prevent an unauthorized user from accessing the E-mail
server. You can use Web Based Management or BRAdmin Professional 3 to configure these settings. You
can use POP before SMTP and SMTP-AUTH methods for E-mail Notification.
E-mail server settings
You need to match the settings of SMTP authentication method with the method used by your E-mail server.
Contact your network administrator or your ISP (Internet Service Provider) about the E-mail server
configuration.
You will also need to check SMTP-AUTH of SMTP Server Authentication Method to enable the SMTP
server authentication.