
Server User Manual

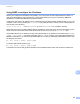

Table Of Contents
- Network User’s Guide
- Applicable models
- Definitions of notes
- IMPORTANT NOTE
- Table of Contents
- Section I: Network Operation
- 1 Introduction
- 2 Changing your machine’s network settings
- 3 Configuring your machine for a wireless network (For HL-5470DW(T) and HL-6180DW(T))
- Overview
- Confirm your network environment
- Wireless configuration temporarily using a USB cable (Recommended for Windows®)
- Configuration using the machine’s control panel Setup Wizard
- One push configuration using WPS (Wi-Fi Protected Setup) or AOSS™
- Configuration using the PIN Method of WPS (Wi-Fi Protected Setup)
- Configuration in Ad-hoc mode (For IEEE 802.11b)
- 4 Control panel setup
- Overview
- Network menu (For HL-5470DW(T) and HL-6180DW(T))
- Reset the network settings to the factory default
- Printing the Printer Settings Page (For HL-5450DN(T))
- Printing the Network Configuration Report (For HL-5470DW(T) and HL-6180DW(T))
- Printing the WLAN report (For HL-5470DW(T) and HL-6180DW(T))
- Function table and default factory settings
- 5 Web Based Management
- 6 Security features
- Overview
- Managing your network machine securely using SSL/TLS
- Secure Management using BRAdmin Professional 3 (Windows®)
- Printing documents securely using SSL/TLS
- Sending an E-mail securely
- Using IEEE 802.1x authentication
- Using Certificates for device security
- Managing multiple certificates
- 7 Troubleshooting
- Section II: Network Glossary
- 8 Types of network connections and protocols
- 9 Configuring your machine for a network
- 10 Wireless network terms and concepts (For HL-5470DW(T) and HL-6180DW(T))
- 11 Additional network settings from Windows®
- Types of additional network settings
- Installing drivers used for printing via Web Services (Windows Vista® and Windows® 7)
- Uninstalling drivers used for printing via Web Services (Windows Vista® and Windows® 7)
- Network printing installation for Infrastructure mode when using Vertical Pairing (Windows® 7)
- 12 Security terms and concepts
- Section III: Appendixes
- Index

111
Appendix B
B
Using ARP to configure the IP address B
If you are unable to use the BRAdmin application and your network does not use a DHCP server, you can
also use the ARP command. The ARP command is available on Windows
®
systems that have TCP/IP
installed as well as UNIX systems. To use ARP enter the following command at the command prompt:
arp -s ipaddress ethernetaddress
ping ipaddress
Where ethernetaddress is the MAC Address (Ethernet Address) of the print server and ipaddress is
the IP address of the print server. For example:
Windows
®
systems
Windows
®
systems require the dash “-” character between each digit of the MAC Address (Ethernet
Address).
arp -s 192.168.1.2 00-80-77-31-01-07
ping 192.168.1.2
UNIX/Linux systems
Typically, UNIX and Linux systems require the colon “:” character between each digit of the MAC Address
(Ethernet Address).
arp -s 192.168.1.2 00:80:77:31:01:07
ping 192.168.1.2
Note
You must be on the same Ethernet segment (that is, there cannot be a router between the print server and
operating system) to use the arp -s command.
If there is a router, you may use BOOTP or other methods described in this chapter to enter the IP address.
If your administrator has configured the system to deliver IP addresses using BOOTP, DHCP or RARP
your Brother print server can receive an IP address from any one of these IP address allocation systems.
In which case, you will not need to use the ARP command. The ARP command only works once. For
security reasons, once you have successfully configured the IP address of a Brother print server using the
ARP command, you cannot use the ARP command again to change the address. The print server will
ignore any attempts to do this. If you wish to change the IP address again, use a Web Based Management
(web browser), TELNET (using the SET IP ADDRESS command) or factory reset the print server (which
will then allow you to use the ARP command again).