
Owner's Manual


Table Of Contents
- Top
- Safety and Legal
- Using the documentation
- Compilation and Publication
- Choosing a location
- To use the machine safely
- Regulation
- Standard telephone and FCC notices
- Federal Communications Commission (FCC) Declaration of Conformity (USA only)
- Industry Canada Compliance Statement (Canada only)
- EQUIPMENT ATTACHMENT LIMITATIONS (Canada only)
- For use in the USA or Canada only
- LAN connection
- International ENERGY STAR® Qualification Statement
- Trademarks
- Open Source Licensing Remarks
- Legal limitations for copying
- brother USA/CAN
- BASIC USER’S GUIDE MFC-J6910DW
- Brother numbers
- Ordering accessories and supplies
- Notice - Disclaimer of Warranties (USA and Canada)
- Compilation and Publication Notice
- User's Guides and where do I find it?
- Table of Contents
- 1 General information
- 2 Loading paper
- 3 Loading documents
- 4 Sending a fax
- 5 Receiving a fax
- 6 Telephone services and external devices
- 7 Dialing and storing numbers
- 8 Making copies
- 9 PhotoCapture Center™: Printing photos from a memory card or USB Flash memory drive
- 10 How to print from a computer
- 11 How to scan to a computer
- A Routine maintenance
- B Troubleshooting
- C Menu and features
- D Specifications
- Index
- brother USA/CAN
- ADVANCED USER’S GUIDE MFC-J6910DW
- User's Guides and where do I find it?
- Table of Contents
- 1 General setup
- 2 Security features
- 3 Sending a fax
- Additional sending options
- Additional sending operations
- Sending a duplex (2-sided) fax from the ADF
- Sending a fax manually
- Sending a fax at the end of a conversation
- Dual Access (Black & White only)
- Broadcasting (Black & White only)
- Real Time Transmission
- Overseas Mode
- Delayed Faxing (Black & White only)
- Delayed Batch Transmission (Black & White only)
- Checking and canceling waiting jobs
- Polling overview
- 4 Receiving a fax
- 5 Dialing and storing numbers
- 6 Printing reports
- 7 Making copies
- Copy settings
- 8 PhotoCapture Center™: Printing photos from a memory card or USB Flash memory drive
- 9 Printing photos from a camera
- A Routine maintenance
- B Glossary
- Index
- brother USA/CAN
- Safety and Legal
66
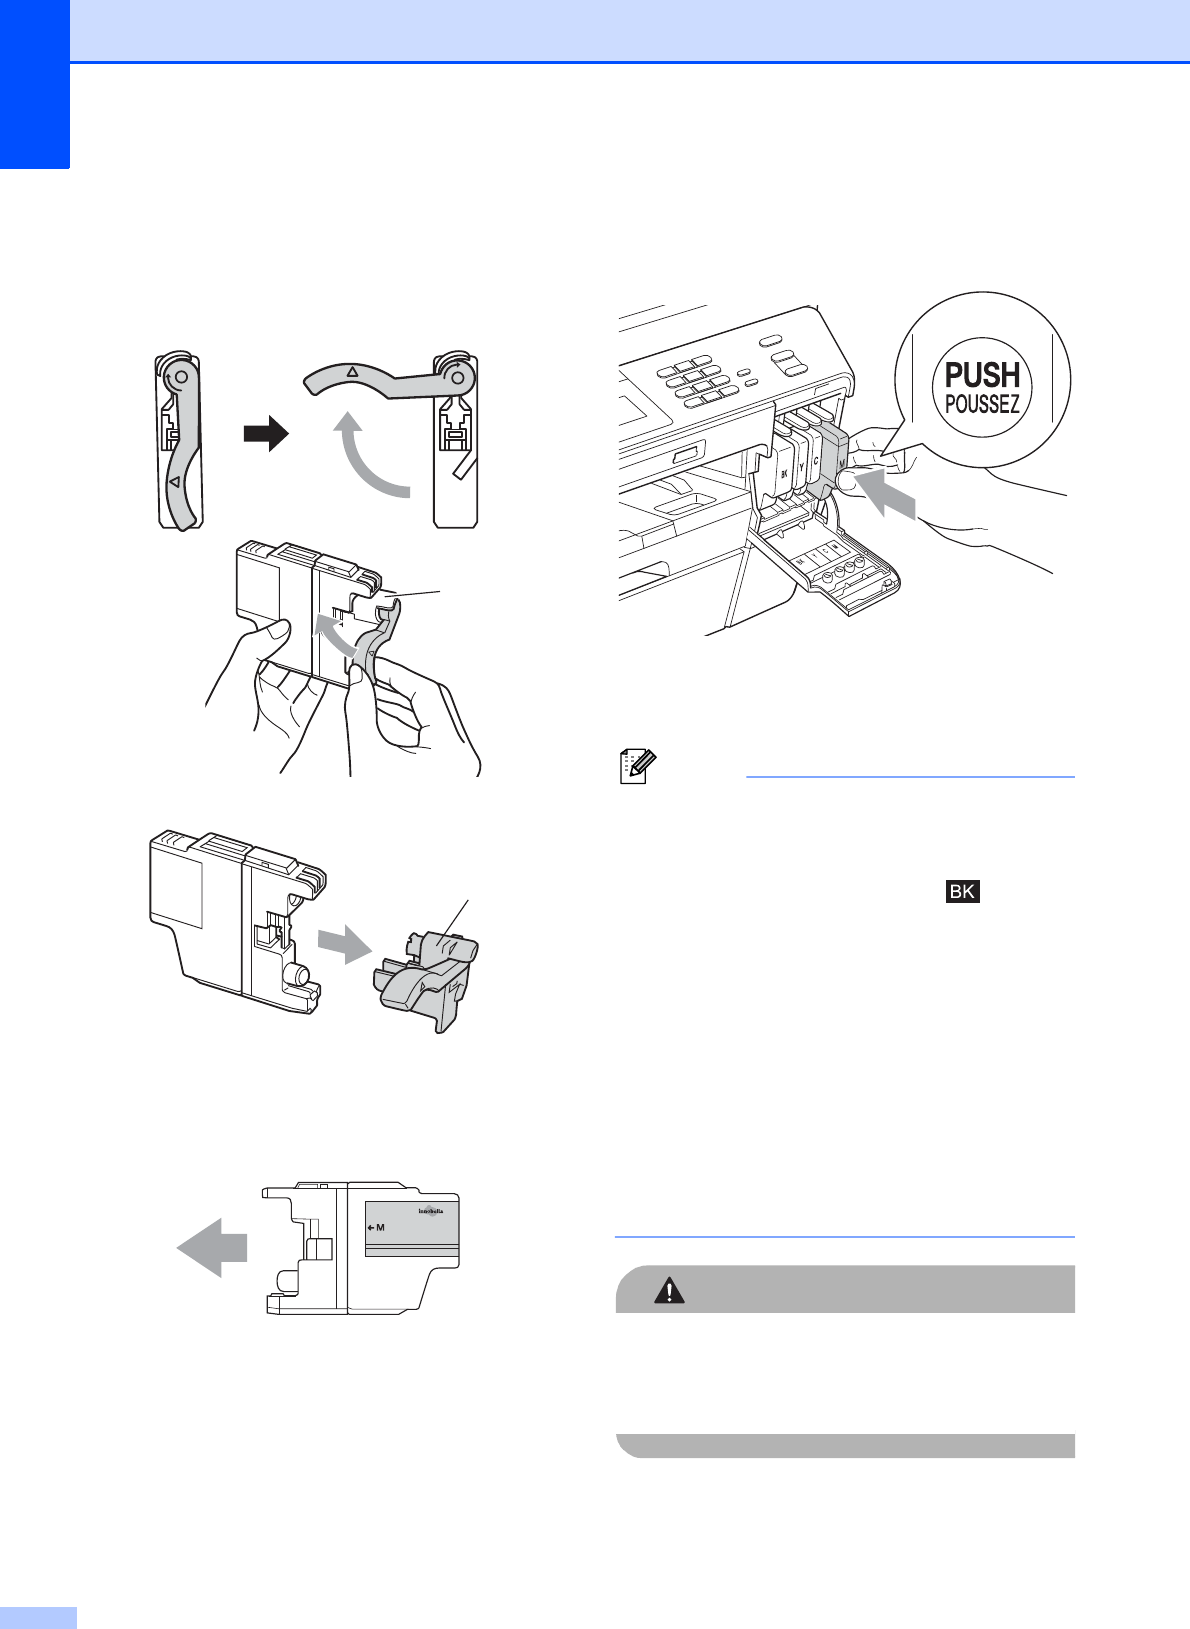
d Turn the green release lever on the
orange protective packing (1) clockwise
until it clicks to release the vacuum seal.
Then remove the orange protective
packing as shown.
e Each color has its own correct position.
Insert the ink cartridge in the direction of
the arrow on the label.
f Gently push the back of the ink cartridge
marked “PUSH” until it clicks, and then
close the ink cartridge cover.
g The machine will automatically reset the
ink dot counter.
Note
• If you replaced an ink cartridge, for
example Black, the LCD may ask you to
verify that it was a brand new one (for
example, Did You Change Black).
For each new cartridge you installed,
press Yes to automatically reset the ink
dot counter for that color. If the ink
cartridge you installed is not a brand new
one, be sure to press No.
• If the LCD shows No Ink Cartridge or
Cannot Detect after you install the ink
cartridges, check that the ink cartridges
are installed properly. Remove the ink
cartridge and reinstall it slowly until it
clicks.
CAUTION
If ink gets in your eyes, wash it out with
water at once and call a doctor if you are
concerned.
1
1