
Owner's Manual


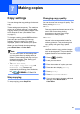


Table Of Contents
- Top
- Safety and Legal
- Using the documentation
- Compilation and Publication
- Choosing a location
- To use the machine safely
- Regulation
- Standard telephone and FCC notices
- Federal Communications Commission (FCC) Declaration of Conformity (USA only)
- Industry Canada Compliance Statement (Canada only)
- EQUIPMENT ATTACHMENT LIMITATIONS (Canada only)
- For use in the USA or Canada only
- LAN connection
- International ENERGY STAR® Qualification Statement
- Trademarks
- Open Source Licensing Remarks
- Legal limitations for copying
- brother USA/CAN
- BASIC USER’S GUIDE MFC-J6910DW
- Brother numbers
- Ordering accessories and supplies
- Notice - Disclaimer of Warranties (USA and Canada)
- Compilation and Publication Notice
- User's Guides and where do I find it?
- Table of Contents
- 1 General information
- 2 Loading paper
- 3 Loading documents
- 4 Sending a fax
- 5 Receiving a fax
- 6 Telephone services and external devices
- 7 Dialing and storing numbers
- 8 Making copies
- 9 PhotoCapture Center™: Printing photos from a memory card or USB Flash memory drive
- 10 How to print from a computer
- 11 How to scan to a computer
- A Routine maintenance
- B Troubleshooting
- C Menu and features
- D Specifications
- Index
- brother USA/CAN
- ADVANCED USER’S GUIDE MFC-J6910DW
- User's Guides and where do I find it?
- Table of Contents
- 1 General setup
- 2 Security features
- 3 Sending a fax
- Additional sending options
- Additional sending operations
- Sending a duplex (2-sided) fax from the ADF
- Sending a fax manually
- Sending a fax at the end of a conversation
- Dual Access (Black & White only)
- Broadcasting (Black & White only)
- Real Time Transmission
- Overseas Mode
- Delayed Faxing (Black & White only)
- Delayed Batch Transmission (Black & White only)
- Checking and canceling waiting jobs
- Polling overview
- 4 Receiving a fax
- 5 Dialing and storing numbers
- 6 Printing reports
- 7 Making copies
- Copy settings
- 8 PhotoCapture Center™: Printing photos from a memory card or USB Flash memory drive
- 9 Printing photos from a camera
- A Routine maintenance
- B Glossary
- Index
- brother USA/CAN
- Safety and Legal

Chapter 7
42
Enlarging or reducing the
copied image 7
You can choose an enlargement or reduction
ratio. If you choose Fit to Page, your
machine will adjust the size automatically to
the paper size you set.
a Press (COPY).
b Load your document.
c Enter the number of copies you want.
d Press d or c to display
Enlarge/Reduce.
e Press Enlarge/Reduce.
f Press 100%, Enlarge, Reduce,
Fit to Page or Custom(25-400%).
g Do one of the following:
If you chose Enlarge or Reduce,
press the enlargement or reduction
ratio you want.
If you chose Custom(25-400%),
enter an enlargement or reduction
ratio from 25% to 400%.
Press OK.
If you chose 100% or Fit to Page,
go to step h.
h If you do not want to change additional
settings, press Black Start or
Color Start.
Note
• Page Layout is not available with
Enlarge/Reduce.
• Page Layout, Book Copy, Sort,
Thin Paper Copy and
Watermark Copy are not available with
Fit to Page.
• Fit to Page does not work properly
when the document on the scanner glass
is skewed more than 3 degrees. Using the
document guidelines on the left and top,
place your document in the upper left
hand corner, with the document face down
on the scanner glass.
• Fit to Page is not available for a Legal
size document.
• When using Ledger or A3 size paper,
1sidei2side and 2sidei2side of
Duplex Copy is not available with
Enlarge/Reduce.
198% 4"x6"iA4
186% 4"x6"iLTR
130% LTRi LGR
104% EXEi LTR
100%
97% LTRiA4
93% A4iLTR
85% LTRiEXE
83% LGLiA4
78% LGLiLTR
64% LGRiLTR
46% LTRi4"x6"
Fit to Page
Custom(25-400%)