
User Manual


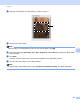


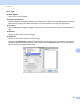

Table Of Contents
- SOFTWARE USER’S GUIDE
- Table of Contents
- Windows®
- 1 Printing
- Using the Brother printer driver
- Features
- Choosing the right type of paper
- Simultaneous printing, scanning and faxing
- Clearing data from the memory
- Status Monitor
- Printer driver settings
- Accessing the printer driver settings
- Basic tab
- Advanced tab
- Print Profiles tab
- Support
- Using FaceFilter Studio for photo printing by REALLUSION
- 2 Scanning
- 3 ControlCenter4
- 4 Remote Setup
- 5 Brother PC-FAX Software
- 6 PhotoCapture Center™
- 7 Firewall settings (For Network users)
- 1 Printing
- Apple Macintosh
- 8 Printing and Faxing
- 9 Scanning
- 10 ControlCenter2
- 11 Remote Setup & PhotoCapture Center™
- Using the Scan key
- Index
- brother CHN-ENG

Scanning
143
9
Document Size 9
Choose one of the following sizes:
Auto
Auto is shown as the default setting for Document Size (for the ADF, A4 or A3 size paper only). You can
scan a standard sized document without any further adjustments to Document Size. If you want to use
Auto Crop, choose a Document Size other than Auto.
A3 297 x 420 mm
Ledger 11 x 17 in.
JIS B4 257 x 364 mm
A4 210 x 297 mm
JIS B5 182 x 257 mm
Letter 8.5 x 11 in.
Legal 8.5 x 14 in.
A5 148 x 210 mm
Executive 7.25 x 10.5 in.
Business Card
To scan business cards, choose the Business Card size, and then put the business card face down at
the top left of the scanner glass.
Photo4x6in.
Index Card 5 x 8 in.
PhotoL89x127mm
Photo 2L 127 x 178 mm
Postcard 1 100 x 148 mm
Postcard 2 (Double) 148 x 200 mm
Custom
After you choose a custom size, you can adjust the scanning area. Click and hold the mouse button as
you drag the mouse to crop the image.
Width: Enter the width of the custom size.
Height: Enter the height of the custom size.