
User Manual


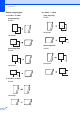


Table Of Contents
- ADVANCED USER’S GUIDE MFC-J6910DW
- User's Guides and where do I find it?
- Table of Contents
- 1 General setup
- 2 Security features
- 3 Sending a fax
- Additional sending options
- Additional sending operations
- Sending a duplex (2-sided) fax from the ADF
- Sending a fax manually
- Sending a fax at the end of a conversation
- Dual Access (Black & White only)
- Broadcasting (Black & White only)
- Real Time Transmission
- Overseas Mode
- Delayed Faxing (Black & White only)
- Delayed Batch Transmission (Black & White only)
- Checking and canceling waiting jobs
- Polling overview
- 4 Receiving a fax
- 5 Dialing and storing numbers
- 6 Printing reports
- 7 Making copies
- Copy settings
- 8 PhotoCapture Center™: Printing photos from a memory card or USB Flash memory drive
- 9 Printing photos from a camera
- A Routine maintenance
- B Glossary
- Index
- brother USA/CAN

Making copies
51
7
g Press Fit to Page or Keep Scale.
Note
If you choose Fit to Page, your
machine will reduce the document size
automatically to fit the printable area.
If you choose Keep Scale, your
machine will not change the document
size. The top and bottom might be cut off
depending on the document size.
h Press d or c to display the duplex copy
type you want, and press it. (See Duplex
copying type on page 52.)
i Enter the number of copies you want.
Note
If you want to sort multiple copies, press
d or c to display Stack/Sort, then press
Sort.
j Press Black Start or Color Start.
If you placed the document in the ADF,
the machine scans the pages and starts
printing.
If you are using the scanner glass, go to
step k.
k Press Scan and place the next page on
the scanner glass. Press Black Start or
Color Start.
The machine starts printing.
l If you pressed Sort for multiple copies,
repeat step k for each additional page.
After all the pages have been scanned,
press Complete.
The machine starts printing.
DO NOT touch the printed page until it is
ejected the second time. The machine will
print the first side and eject the paper and
then pull the paper in to print the second side.
Note
• If you get a paper jam, press More after
step c. Press Advanced, and then press
one of the jam prevention settings: DX1 or
DX2.
DX1 uses a longer print time for the ink to
dry.
DX2 uses a longer print time and will also
print in lighter colors.
• DX1 is not available for Ledger or A3 size
paper.
• 2 in 1 (ID), Poster and Book Copy
are not available with Duplex Copy.
• 1to2 and Skew Adjustment are not
available with 2sidei2side and
2sidei1side.
• When using Ledger or A3 size paper,
Enlarge/Reduce is not available with
1sidei2side and 2sidei2side.
• Fit to Page is not available with
1sidei2side and 2sidei2side.