
User Manual
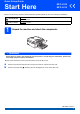
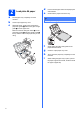
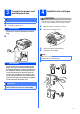
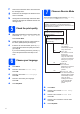
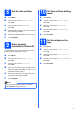
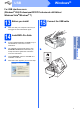
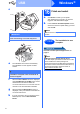
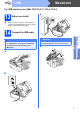

Table Of Contents
- Quick Setup Guide MFC-J220 MFC-J410
- Start Here
- 1 Unpack the machine and check the components
- 2 Load plain A4 paper
- 3 Connect the power cord and telephone line
- 4 Install the ink cartridges
- 5 Check the print quality
- 6 Choose your language
- 7 Choose a Receive Mode
- 8 Set the date and time
- 9 Enter personal information (Station ID)
- 10 Set Tone or Pulse dialling mode
- 11 Set the telephone line type
- 12 Set the phone line compatibility
- For USB interface users (Windows® 2000 Professional/XP/XP Professional x64 Edition/ Windows Vista®/Windows® 7)
- For USB interface users (Mac OS X 10.4.11, 10.5.x, 10.6.x)
- Install Optional Applications Windows®
- brother CEE-ENG
- Start Here

7
Windows
®
USB
Windows
®
Macintosh
USB
For USB interface users
(Windows
®
2000 Professional/XP/XP Professional x64 Edition/
Windows Vista
®
/Windows
®
7)
13
Before you install
a Make sure that your computer is ON and you
are logged on with Administrator rights.
14
Install MFL-Pro Suite
a Put the supplied installation CD-ROM into your
CD-ROM drive. Follow the on-screen
instructions.
b The CD-ROM Top Menu will appear. Click
Install MFL-Pro Suite and click Yes if you
accept the license agreements. Follow the
on-screen instructions.
c Choose Standard, and then click Next. The
installation continues.
d When this screen appears, go to the next step.
15
Connect the USB cable
a
b
USB