
Network User's Guide

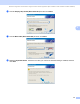
Table Of Contents
- NETWORK USER’S GUIDE
- Table of Contents
- 1 Introduction
- 2 Configuring your machine for a network with an Ethernet cable connection
- Overview
- IP addresses, subnet masks and gateways
- Step by step chart
- Setting up the IP address and subnet mask
- Changing the print server settings
- Using the BRAdmin Light utility to change the print server settings
- Using the BRAdmin Professional utility to change the wireless settings (For Windows®)
- Using the Remote Setup to change the print server settings (Not available for DCP models)
- Using the control panel to change the print server settings
- 3 Configuring your machine for a wireless network (Not available for MFC-5490CN and MFC-5890CN)
- Overview
- Wireless network terms and concepts
- Step by step chart for wireless network configuration
- Confirm your network environment
- Confirm your wireless network setup method
- Configuration using the machine’s control panel Setup Wizard to configure your wireless network machine
- Configuration using the SES/WPS/AOSS control panel menu (Infrastructure mode only)
- Configuration using the PIN Method of Wi-Fi Protected Setup™ (Infrastructure mode only)
- Configuration using the Brother installer application on the CD-ROM to configure your wireless network machine
- Configuring your machine for a wireless network
- 4 Wireless configuration for Windows® using the Brother installer application (Not available for MFC-5490CN and MFC-5890CN)
- 5 Wireless Configuration for Macintosh® using the Brother installer application (Not available for MFC-5490CN and MFC-5890CN)
- 6 Control panel setup
- Network menu
- TCP/IP
- Setup Misc. (MFC-5490CN only)
- Setup Wizard (wireless network only)
- SES/WPS/AOSS (wireless network only)
- WPS w/PIN code (wireless network only)
- WLAN Status (wireless network only)
- Ethernet (wired network only)
- E-mail/I-FAX (For MFC-6490CW and MFC-6890CDW)
- Scan to FTP (For MFC-5890CN and MFC-6490CW)
- Scan to FTP (For MFC-6890CDW)
- Time Zone (For MFC-6490CW and MFC-6890CDW)
- Network I/F (Not available for MFC-5490CN and MFC-5890CN)
- LDAP (For MFC-6890CDW)
- Restoring the network settings to factory default
- Printing the Network Configuration List
- Network menu
- 7 Driver Deployment Wizard (Windows® only)
- 8 Network printing from Windows® basic TCP/IP Peer-to-Peer printing
- 9 Network printing from a Macintosh®
- 10 LDAP operation (For MFC-6890CDW)
- 11 Internet fax and Scan to E-mail (For MFC-6490CW and MFC-6890CDW)
- Internet fax overview
- Getting connected
- Control panel key functions
- Sending an Internet fax
- Manually entering text
- Receiving E-mail or Internet fax
- Receiving an Internet fax to your computer
- Forwarding received E-mail and fax messages
- Relay broadcasting
- TX Verification Mail
- Setup Mail TX
- Setup Mail RX
- Error mail
- Important information on Internet fax
- Scan to E-mail Server overview (MFC-6490CW and MFC-6890CDW)
- Internet fax overview
- 12 Security features (For MFC-6490CW and MFC-6890CDW)
- 13 Troubleshooting
- Appendix A
- Appendix B
- Appendix C
- Index

Configuring your machine for a wireless network (Not available for MFC-5490CN and MFC-5890CN)
31
3
Using the SES/WPS/AOSS control panel menu to configure your machine for a
wireless network 3
If your wireless access point supports either SecureEasySetup™, Wi-Fi Protected Setup™ (PBC
1
) or
AOSS™ (one-push method), you can configure the machine easily without a computer. Your Brother
machine has the SES/WPS/AOSS menu available from the control panel. This feature automatically detects
which mode your access point uses, SecureEasySetup™, Wi-Fi Protected Setup™ or AOSS™. By pushing
a button on the wireless LAN router / access point, you can setup the wireless network and security settings.
See the user’s guide for your wireless LAN router / access point for instructions on how to access one-push
mode.
1
Push Button Configuration
Note
Routers or access points that support SecureEasySetup™, Wi-Fi Protected Setup™ or AOSS™ have the
appropriate symbols shown below.
a Turn on the machine by plugging in the power cord.
b Press Menu on the control panel of the Brother machine.
c Press a or b to choose Network.
Press OK.
d Press a or b to choose WLAN.
Press OK.
e Press a or b to choose SES/WPS/AOSS.
Press OK.
This feature will automatically detect which mode (SecureEasySetup™, Wi-Fi Protected Setup™ or
AOSS™) your access point uses to configure your machine.
Note
If your wireless access point supports Wi-Fi Protected Setup™ (PIN Method) and you want to configure
your machine using the PIN (Personal Identification Number) Method, see Using the PIN Method of Wi-Fi
Protected Setup™ on page 35.
f The machine searches for an access point that supports SecureEasySetup™, Wi-Fi Protected Setup™
or AOSS™ for 2 minutes.
g Put your access point in the SecureEasySetup™ mode, Wi-Fi Protected Setup™ mode or AOSS™
mode, depending on what is supported by your access point. Please refer to the instruction manual that
came with your access point.