
Owner`s manual


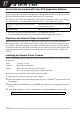


Table Of Contents
- ZleFB MFC-9880
- APPROVAL INFORMATION
- Using This Manual
- User-Friendly Programming
- Table of Contents
- Preparation and Simple User Guide
- 1 Setup
- 2 Sending a Fax
- 3 Receiving a Fax
- 4 Telephone (Voice) Operation
- 5 Printing Reports
- 6 Advanced Sending
- 7 Advanced Receiving
- 8 Polling
- 9 Remote Fax Options
- 10 Making Copies
- 11 Using the machine as a Printer
- 12 Printer Driver Settings (For Windows® Only)
- Using the Brother MFC-9880 Printer Driver
- Basic Tab
- Advanced Tab
- Accessories Tab
- Support Tab
- General Tab
- Layout Tab
- Paper/Quality Tab
- Advanced Options
- Device Settings Tab
- 13 Using the Windows®-Based Brother Control Centre (For Windows® Only)
- 14 Using ScanSoft™ PaperPort® for Brother and ScanSoft™ TextBridge®
- Viewing Items in ScanSoft™ PaperPort® for Brother
- Organizing Your Items in Folders
- Links to Many Other Applications
- Using ScanSoft™ TextBridge® OCR (Converting Image Text to Text You Can Edit)
- Importing Items from Other Applications
- Exporting Items in Other Formats
- Accessing the Scanner
- Scanning a Document into your PC
- Settings in the Scanner Window
- PreScanning an Image
- 15 Setting Up and Using PC-FAX (For Windows® Only)
- Introduction
- MFC Remote Setup
- PC-FAX Sending (For Windows® Only)
- Setting Up User Information
- Setting Up Sending
- Setting Up Speed Dial
- The Address Book
- Setting Up a Member in the Address Book
- Setting Up a Group for Broadcasting
- Editing Member Information
- Deleting a Member or Group
- Exporting the Address Book
- Importing to the Address Book
- Setting Up Cover Page
- Sending a File as a PC-FAX Using the Simple Style
- Sending a File as a PC-FAX using the Facsimile Style
- PC-FAX Receiving
- 16 Using the Brother MFC with a New Power Macintosh® G3, G4 or iMac™/iBook™
- 17 For DOS User
- 18 Troubleshooting and Maintenance
- 19 Important Safety Information
- 20 Optional Accessories
- 21 Specifications
- Glossary
- Index
124 Chapter 17
17
For DOS User
How to Use the machine with Your DOS Application Software
Before working with your application software that runs on DOS, check that the machine’s name
appears in the printer selection of your application software. If the machine is not listed, you must
install the printer driver that corresponds to HP LaserJet 5P’s emulations.
The following table shows the combination of printer driver and emulation mode. To get the most
out of this machine, you should install an HP printer driver in your application software.
• Be sure to choose the proper printer driver in your application software.
• Be sure the printing resolution is set to 600 dpi in your DOS application software.
What Does the Remote Printer Console Do?
The Remote Printer Console (RPC) is a utility program that can run in the DOS environment:
This program allows you to change various printer settings such as emulation, print quality, fonts,
page setup etc., from your computer screen. Since most DOS applications have a Printer Settings
menu that overrides the settings made by the RPC, you may not have to use this utility program. This
utility program is useful for application software that does not control the printer’s settings and
features.
Installing the Remote Printer Console
Before you install the program, make sure you have the following hardware and software to install
the program:
Follow these steps to install the remote printer console program:
1
Make sure the machine is connected to your computer.
2
Start your computer and go to the DOS prompt. If you are in Windows
®
, exit and return to the
DOS prompt.
3
Insert the Brother CD-ROM into your CD-ROM drive (substitute your appropriate drive letter
for “X”).
4
At the DOS prompt (C:\>) type X: (X is the letter of your CD-ROM drive) and press Enter.
Printer driver supported in your application
software
Emulation mode to be selected with the remote
printer console program
HP LaserJet 5P
™
HP LaserJet 5P emulation mode
DOS Version 3.3 or later
Monitor EGA/VGA or compatible
Option Mouse; the mouse driver must be installed.
(You can also operate the program with the keyboard.)
C:\>X: