
Network User's Guide for Internet Fax


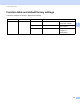
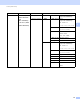
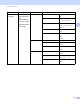
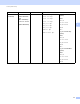
Table Of Contents
- NETWORK USER’S GUIDE
- Definitions of notes
- IMPORTANT NOTE
- Table of Contents
- 1 Internet fax
- 2 Storing numbers and E-mail addresses
- 3 Control panel setup
- E-mail/IFAX menu
- Function table and default factory settings
- Index

Control panel setup
29
3
Scan to E-mail (E-mail Server) 3
When you choose Scan to E-mail (E-mail Server) you can scan a black and white or color document and send
it directly to an E-mail address from the machine. You can choose PDF, PDF/A, Secure PDF, Signed PDF or
TIFF for Black and White and PDF, PDF/A, Secure PDF, Signed PDF, XPS or JPEG for color or gray.
Note
Scan to E-mail (E-mail Server) requires SMTP/POP3 mail server support.
a Load your document.
b Press (SCAN).
c Press a or b to choose Scan to E-mail.
Press OK.
(MFC-9460CDN) Go to step e.
(MFC-9465CDN and MFC-9560CDW) Go to step d.
d Press a or b to choose 1sided, 2sided (L)edge or 2sided (S)edge.
Press OK.
e Press a or b to choose Change Setting.
Press OK.
If you don’t have to change the quality, press a or b to choose Enter Address.
Press OK and then go to step i.
f Press a or b to choose Color 1 00 dpi, Color 200 dpi, Color 300 dpi, Color 600 dpi,
Gray 100 dpi, Gray 200 dpi, Gray 300 dpi, B&W 200 dpi or B&W 200x100 dpi.
Press OK.
If you choose Color 100 dpi, Color 200 dpi, Color 300 dpi, Color 600 dpi,
Gray 100 dpi, Gray 200 dpi or Gray 300 dpi, go to step g.
If you choose B&W 200 dpi or B&W 200x100 dpi, go to step h.
g Press a or b to choose PDF, PDF/A, Secure PDF, Signed PDF, JPEG or XPS.
Press OK and go to step i.
h Press a or b to choose PDF, PDF/A, Secure PDF, Signed PDF or TIFF.
Press OK and go to step i.