
Network User's Guide


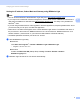
Table Of Contents
- NETWORK USER’S GUIDE
- Definitions of notes
- IMPORTANT NOTE
- Table of Contents
- 1 Introduction
- 2 Changing your machine’s network settings
- 3 Configuring your machine for a wireless network (For MFC-9560CDW and MFC-9970CDW)
- Overview
- Step by step chart for wireless network configuration
- Confirm your network environment
- Confirm your wireless network setup method
- Configuration using WPS or AOSS™ from the control panel menu to configure your machine for a wireless network (Automatic Wireless mode) (Infrastructure mode only) (Recommended)
- Configuration using the machine’s control panel Setup Wizard to configure your machine for a wireless network
- Configuration using the Brother installer application on the CD-ROM to configure your machine for a wireless network
- Configuration using the PIN Method of Wi-Fi Protected Setup to configure your machine for a wireless network (Infrastructure mode only)
- Configuring your machine for a wireless network (For Infrastructure mode and Ad-hoc mode)
- Using WPS or AOSS™ from the control panel menu to configure your machine for a wireless network (Automatic Wireless mode)
- Using the Setup Wizard from the control panel
- Configuring your machine when the SSID is not broadcast
- Configuring your machine for an enterprise wireless network
- Using the Brother installer application on the CD-ROM to configure your machine for a wireless network
- Using the PIN Method of Wi-Fi Protected Setup
- 4 Wireless configuration using the Brother installer application (For MFC-9560CDW and MFC-9970CDW)
- 5 Control panel setup
- Network menu
- TCP/IP
- Ethernet (wired network only)
- Status (For DCP-9055CDN, DCP-9270CDN, MFC-9460CDN and MFC-9465CDN)/Wired Status (For MFC-9560CDW and MFC-9970CDW)
- Setup Wizard (wireless network only)
- WPS or AOSS™ (wireless network only)
- WPS w/PIN Code (wireless network only)
- WLAN Status (wireless network only)
- MAC Address
- Set to Default (For MFC-9560CDW and MFC-9970CDW)
- Wired Enable (For MFC-9560CDW and MFC-9970CDW)
- WLAN Enable (For MFC-9560CDW and MFC-9970CDW)
- E-mail / IFAX (MFC-9970CDW and DCP-9270CDN (E-mail only))
- Fax to Server (For MFC-9970CDW)
- How to set a new default for Scan to FTP
- How to set a new default for Scan to Network
- Reset the network settings to the factory default
- Printing the Network Configuration List
- Printing the WLAN report (For MFC-9560CDW and MFC-9970CDW)
- Function table and default factory settings
- Network menu
- 6 Web Based Management
- Overview
- How to configure the machine settings using Web Based Management (web browser)
- Password information
- Secure Function Lock 2.0
- Synchronize with SNTP server
- Store Print Log to Network
- Changing the Scan to FTP configuration using a web browser
- Changing the Scan to Network configuration using a web browser
- Changing the LDAP configuration using a web browser (For DCP-9270CDN and MFC-9970CDW)
- 7 LDAP operation (For DCP-9270CDN and MFC-9970CDW)
- 8 Internet fax (For MFC-9970CDW)
- 9 Security features
- Overview
- Managing your network machine securely using SSL/TLS
- Printing documents securely using SSL/TLS
- Sending or Receiving an E-mail securely
- Using IEEE 802.1x authentication
- Secure Management using BRAdmin Professional 3 (Windows®)
- Using Certificates for device security
- Managing multiple certificates
- 10 Troubleshooting
- Appendix A
- Index
- Network Glossary
- Table of Contents
- 1 Types of network connections and protocols
- 2 Configuring your machine for a network
- 3 Wireless network terms and concepts
- 4 Additional network settings from Windows®
- 5 Security terms and concepts
- Appendix A
- Index

Changing your machine’s network settings
5
2
Setting the IP address, Subnet Mask and Gateway using BRAdmin Light 2
Note
• You can download Brother's latest BRAdmin Light utility from http://solutions.brother.com/.
• If you require more advanced machine management, use the latest version of BRAdmin Professional 3
utility that is available as a download from http://solutions.brother.com/
. This utility is only available for
Windows
®
users.
• If you are using a firewall function of anti-spyware or antivirus applications, temporarily disable them. Once
you are sure that you can print, re-enable the application.
• Node name: The Node name appears in the current BRAdmin Light window. The default node name of
the print server in the machine is “BRNxxxxxxxxxxxx” for a wired network or “BRWxxxxxxxxxxxx” for a
wireless network. (“xxxxxxxxxxxx” is your machine’s MAC Address / Ethernet Address.)
• The default password for Brother print servers is “access”.
a Start the BRAdmin Light utility.
Windows
®
Click Start / All Programs
1
/ Brother / BRAdmin Light / BRAdmin Light.
1
Programs for Windows
®
2000 users
Macintosh
Double-click Macintosh HD (Startup Disk) / Library / Printers / Brother / Utilities /
BRAdmin Light.jar file.
b BRAdmin Light will search for new devices automatically.