
User Manual


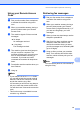


Table Of Contents
- USER’S GUIDE MFC-9125CN MFC-9325CW
- Approval Information and Compilation and Publication Notice
- Table of Contents
- Section I: General
- 1 General information
- Using the documentation
- Accessing the Software User’s Guide and Network User’s Guide
- Viewing documentation
- Viewing documentation (Windows®)
- How to find scanning instructions
- Software User’s Guide:
- ScanSoft™ PaperPort™ 11SE with OCR How-to-Guides:
- How to find Network setup instructions
- Viewing documentation (Macintosh)
- How to find scanning instructions
- Software User’s Guide:
- Presto! PageManager User’s Guide:
- How to find Network setup instructions
- Viewing the Mobile Print/Scan Guide documentation
- Viewing documentation
- Accessing Brother Support (For Windows®)
- Control panel overview
- 2 Loading paper and documents
- 3 General Setup
- 4 Security features
- 1 General information
- Section II: Fax
- 5 Sending a fax
- How to fax
- Broadcasting (black & white only)
- Additional sending operations
- Sending faxes using multiple settings
- Electronic cover page (black & white only)
- Contrast
- Changing Fax Resolution
- Dual access (black & white only)
- Real Time Transmission
- Overseas Mode
- Delayed Fax (black & white only)
- Delayed batch transmission (black & white only)
- Checking and cancelling waiting jobs
- Sending a fax manually
- Out of memory message
- 6 Receiving a fax
- 7 Telephone and external devices
- Telephone line services
- Telephone Service for Australia
- Telephone Service for New Zealand
- Telephone Service for Some Countries
- Connecting an external TAD
- External and extension telephones
- 8 Dialling and storing numbers
- 9 Remote Fax Options (black & white only)
- 10 Polling
- 11 Printing reports
- 5 Sending a fax
- Section III: Copy
- Section IV: Direct printing
- Section V: Software
- Section VI: Appendixes
- A Safety and legal
- B Options
- C Troubleshooting and routine maintenance
- Troubleshooting
- Error and maintenance messages
- Routine maintenance
- Replacing the consumable items
- Replacing periodic maintenance parts
- Machine Information
- Packing and shipping the machine
- D Menu and features
- E Specifications
- F Glossary
- Index

Dialling and storing numbers
69
8
d To add One Touch or Speed Dial
numbers follow the instructions below:
For One Touch numbers, press the
One Touch keys one after the other.
For Speed Dial numbers, press
(Address Book) and then enter
the three-digit Speed Dial location.
The LCD will display your chosen One
Touch numbers with a l and Speed Dial
numbers with a # (for example l006,
#009).
e Press OK when you have finished
adding numbers.
f Do one of the following:
Enter the name using the dial pad
(up to 15 characters). Use the chart
on Entering text on page 217 to help
you enter letters.
Press OK.
Press OK to store the group without
a name.
g If you want to save a fax resolution along
with the number, choose one of the
options below:
To store the fax resolution, press a or
b to select Std, Fine, S.Fine or
Photo.
Press OK.
Press OK if you do not want to
change the default resolution.
h Do one of the following:
To store another group for
broadcasting, go to step b.
To finish storing groups for
broadcasting, press Stop/Exit.
If you downloaded I-FAX, Fax/Tel and
E-mail options
a Press Menu, 2, 3, 3.
b Choose an empty location where you
want to store the group in one of the
following ways:
Press a One Touch key.
Press (Address Book) and then
enter the three-digit Speed Dial
location.
Press OK.
c Use the dial pad to enter a group
number (01 to 20).
Press OK.
d Press a or b to select Fax/IFAX or
E-Mail.
Press OK.
e To add One Touch or Speed Dial
numbers follow the instructions below:
For One Touch numbers, press the
One Touch keys one after the other.
For Speed Dial numbers, press
(Address Book) and then enter
the three-digit Speed Dial location.
The LCD will display your chosen One
Touch numbers with a l and Speed Dial
numbers with a # (for example l006,
#009).
f Press OK when you have finished
adding numbers.
g Do one of the following:
Enter the name using the dial pad
(up to 15 characters). Use the chart
on Entering text on page 217 to help
you enter letters.
Press OK.
Press OK to store the group without
a name.