
User Manual
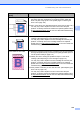

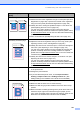


Table Of Contents
- USER’S GUIDE MFC-9125CN MFC-9325CW
- Approval Information and Compilation and Publication Notice
- Table of Contents
- Section I: General
- 1 General information
- Using the documentation
- Accessing the Software User’s Guide and Network User’s Guide
- Viewing documentation
- Viewing documentation (Windows®)
- How to find scanning instructions
- Software User’s Guide:
- ScanSoft™ PaperPort™ 11SE with OCR How-to-Guides:
- How to find Network setup instructions
- Viewing documentation (Macintosh)
- How to find scanning instructions
- Software User’s Guide:
- Presto! PageManager User’s Guide:
- How to find Network setup instructions
- Viewing the Mobile Print/Scan Guide documentation
- Viewing documentation
- Accessing Brother Support (For Windows®)
- Control panel overview
- 2 Loading paper and documents
- 3 General Setup
- 4 Security features
- 1 General information
- Section II: Fax
- 5 Sending a fax
- How to fax
- Broadcasting (black & white only)
- Additional sending operations
- Sending faxes using multiple settings
- Electronic cover page (black & white only)
- Contrast
- Changing Fax Resolution
- Dual access (black & white only)
- Real Time Transmission
- Overseas Mode
- Delayed Fax (black & white only)
- Delayed batch transmission (black & white only)
- Checking and cancelling waiting jobs
- Sending a fax manually
- Out of memory message
- 6 Receiving a fax
- 7 Telephone and external devices
- Telephone line services
- Telephone Service for Australia
- Telephone Service for New Zealand
- Telephone Service for Some Countries
- Connecting an external TAD
- External and extension telephones
- 8 Dialling and storing numbers
- 9 Remote Fax Options (black & white only)
- 10 Polling
- 11 Printing reports
- 5 Sending a fax
- Section III: Copy
- Section IV: Direct printing
- Section V: Software
- Section VI: Appendixes
- A Safety and legal
- B Options
- C Troubleshooting and routine maintenance
- Troubleshooting
- Error and maintenance messages
- Routine maintenance
- Replacing the consumable items
- Replacing periodic maintenance parts
- Machine Information
- Packing and shipping the machine
- D Menu and features
- E Specifications
- F Glossary
- Index

140
The colour of your printouts is
not what you expected
Make sure Toner Save mode is off in the control panel of the machine
or the printer driver.
Perform the calibration. (See Calibration on page 168.)
Adjust the colour by using the custom setting in the driver and by
using the control panel of the machine. Colours the machine can print
and colours you see on a monitor are different. The machine may not
be able to reproduce the colours on your monitor.
If colours appear in the printed grey areas, make sure there is a check
in the Improve Grey Colour check box of the printer driver. (See
Basic tab for Windows
®
printer driver, Advanced tab for Macintosh
printer driver or Printer Features for Macintosh BR-Script printer
driver in the Software User's Guide on the CD-ROM.)
If shaded areas look dull, remove the check from the Improve Grey
Colour check box.
If a printed black graphic is too light, choose Enhance Black Printing
mode in the printer driver. (See Settings Dialog for Windows
®
printer
driver, Advanced options for Windows
®
BR-Script printer driver, Print
Settings for Macintosh printer driver or Printer Features for Macintosh
BR-Script printer driver in the Software User's Guide on the
CD-ROM.)
Identify the colour causing the problem and put in a new toner
cartridge. (See Replacing a Toner cartridge on page 172.)
You may only need to replace one toner cartridge to solve the print
problem. To identify which toner cartridge needs to be replaced,
please visit us at http://solutions.brother.com/
to view our FAQs and
troubleshooting tips.
Identify the colour causing the problem and put in a new drum unit.
(See Replacing the drum units on page 178.)
You may only need to replace one drum unit to solve the print problem.
To identify which drum needs to be replaced, please visit us at
http://solutions.brother.com/
to view our FAQs and troubleshooting tips
.
All one colour
Identify the colour causing the problem and put in a new drum unit.
(See Replacing the drum units on page 178.)
You may only need to replace one drum unit to solve the print
problem. To identify which drum needs to be replaced, please visit us
at http://solutions.brother.com/
to view our FAQs and troubleshooting
tips.
Examples of poor print
quality
Recommendation