
User Manual
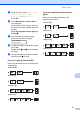
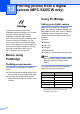

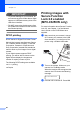
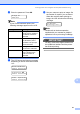
Table Of Contents
- USER’S GUIDE MFC-9125CN MFC-9325CW
- Approval Information and Compilation and Publication Notice
- Table of Contents
- Section I: General
- 1 General information
- Using the documentation
- Accessing the Software User’s Guide and Network User’s Guide
- Viewing documentation
- Viewing documentation (Windows®)
- How to find scanning instructions
- Software User’s Guide:
- ScanSoft™ PaperPort™ 11SE with OCR How-to-Guides:
- How to find Network setup instructions
- Viewing documentation (Macintosh)
- How to find scanning instructions
- Software User’s Guide:
- Presto! PageManager User’s Guide:
- How to find Network setup instructions
- Viewing the Mobile Print/Scan Guide documentation
- Viewing documentation
- Accessing Brother Support (For Windows®)
- Control panel overview
- 2 Loading paper and documents
- 3 General Setup
- 4 Security features
- 1 General information
- Section II: Fax
- 5 Sending a fax
- How to fax
- Broadcasting (black & white only)
- Additional sending operations
- Sending faxes using multiple settings
- Electronic cover page (black & white only)
- Contrast
- Changing Fax Resolution
- Dual access (black & white only)
- Real Time Transmission
- Overseas Mode
- Delayed Fax (black & white only)
- Delayed batch transmission (black & white only)
- Checking and cancelling waiting jobs
- Sending a fax manually
- Out of memory message
- 6 Receiving a fax
- 7 Telephone and external devices
- Telephone line services
- Telephone Service for Australia
- Telephone Service for New Zealand
- Telephone Service for Some Countries
- Connecting an external TAD
- External and extension telephones
- 8 Dialling and storing numbers
- 9 Remote Fax Options (black & white only)
- 10 Polling
- 11 Printing reports
- 5 Sending a fax
- Section III: Copy
- Section IV: Direct printing
- Section V: Software
- Section VI: Appendixes
- A Safety and legal
- B Options
- C Troubleshooting and routine maintenance
- Troubleshooting
- Error and maintenance messages
- Routine maintenance
- Replacing the consumable items
- Replacing periodic maintenance parts
- Machine Information
- Packing and shipping the machine
- D Menu and features
- E Specifications
- F Glossary
- Index

Chapter 13
96
IMPORTANT
• To prevent damage to your machine, do
not connect any device other than a digital
camera or USB flash memory drive to the
USB direct interface.
• DO NOT remove the digital camera from
the USB direct interface until the machine
has finished printing.
DPOF printing 13
DPOF stands for Digital Print Order Format.
Major digital camera manufacturers (Canon
Inc., Eastman Kodak Company, FUJIFILM
Corporation, Panasonic Corporation and
Sony Corporation) created this standard to
make it easier to print images from a digital
camera.
If your digital camera supports DPOF
printing, you will be able to choose on the
digital camera display the images and
number of copies you want to print.
The following DPOF settings are available.
1 in 1 printing
Copies
Printing images with
Secure Function
Lock 2.0 enabled
(MFC-9325CW only)
13
For more information about Secure Function
Lock 2.0, see Chapter 11 of the Network
User’s Guide on the CD-ROM we have
supplied.
a Make sure that your camera is turned
off. Connect your camera to the USB
direct interface (1) on the front of the
printer using a suitable USB cable.
b Turn on the camera. Make sure your
camera is in PictBridge mode.
When the machine has recognized the
camera, the LCD shows the following
message.
Access Denied
c Press a or b to choose ID. Press OK.
1