
User Manual
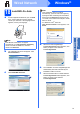
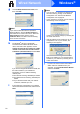
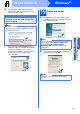
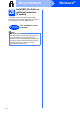
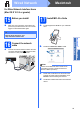
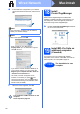
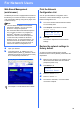
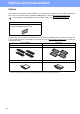
Table Of Contents
- Quick Setup Guide MFC-9120CN
- Start Here
- 1 Unpack the machine and check the components
- 2 Remove the packing material from the machine
- 3 Install the drum unit and toner cartridge assemblies
- 4 Load paper in the paper tray
- 5 Connect the power cord and telephone line
- 6 Choose a Receive Mode
- 7 Choose your language (if needed)
- 8 Set The LCD contrast (if needed)
- 9 Set the date and time
- 10 Enter personal information (station ID)
- 11 Fax Transmission Report
- 12 Set tone or pulse dialling mode
- 13 Dial Prefix
- 14 Choose your connection type
- For USB Interface Users (Windows® 2000 Professional/XP/XP Professional x64 Edition/ Windows Vista®)
- For USB Interface Users (Mac OS X 10.3.9 or greater)
- For Wired Network Interface Users (Windows® 2000 Professional/XP/XP Professional x64 Edition/ Windows Vista®)
- For Wired Network Interface Users (Mac OS X 10.3.9 or greater)
- For Network Users
- Options and Consumables
- brother CHN-ENG
- Start Here

25
Macintosh
Wired Network
Windows
®
Macintosh
Wired Network
For Wired Network Interface Users
(Mac OS X 10.3.9 or greater)
15
Before you install
a Make sure your machine is connected to the
power and your Macintosh is ON. You must be
logged on with Administrator rights.
16
Connect the network
cable
a Connect the network interface cable to the LAN
connector marked with a symbol and then
connect it to a free port on your hub.
17
Install MFL-Pro Suite
a Put the supplied CD-ROM into your CD-ROM
drive.
b Double-click Start Here OSX to install.
c Please wait, it will take a few seconds for the
software to install. After the installation, click
Restart to finish installing the software.
d The Brother software will search for the Brother
device.
IMPORTANT
For the latest drivers and information on the
Mac OS X you are using, visit
http://solutions.brother.com/
.
Note
Please see the Network User’s Guide on the
CD-ROM if you want to install the PS driver.
(Brother’s BR-Script Driver)