
User Manual

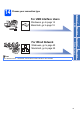
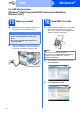
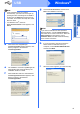
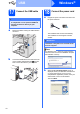

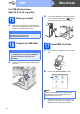
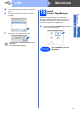
Table Of Contents
- Quick Setup Guide MFC-9120CN
- Start Here
- 1 Unpack the machine and check the components
- 2 Remove the packing material from the machine
- 3 Install the drum unit and toner cartridge assemblies
- 4 Load paper in the paper tray
- 5 Connect the power cord and telephone line
- 6 Choose a Receive Mode
- 7 Choose your language (if needed)
- 8 Set The LCD contrast (if needed)
- 9 Set the date and time
- 10 Enter personal information (station ID)
- 11 Fax Transmission Report
- 12 Set tone or pulse dialling mode
- 13 Dial Prefix
- 14 Choose your connection type
- For USB Interface Users (Windows® 2000 Professional/XP/XP Professional x64 Edition/ Windows Vista®)
- For USB Interface Users (Mac OS X 10.3.9 or greater)
- For Wired Network Interface Users (Windows® 2000 Professional/XP/XP Professional x64 Edition/ Windows Vista®)
- For Wired Network Interface Users (Mac OS X 10.3.9 or greater)
- For Network Users
- Options and Consumables
- brother CHN-ENG
- Start Here

17
Windows
®
USB
Windows
®
USB
Macintosh
19
Finish and restart
a Click Finish to restart your computer.
After restarting the computer, you must be
logged on with Administrator rights.
b If this screen appears, choose the firmware
update setting and click OK.
Note
If an error message appears during the software
installation, run the Installation Diagnostics
located in Start/All Programs/Brother/
MFC-XXXX (where MFC-XXXX is your model
name).
Note
Internet access is required for the firmware
upgrade.
Finish
The installation is now
complete.
Note
XML Paper Specification Printer Driver
The XML Paper Specification Printer Driver is the
most suitable driver when printing from the
applications that use the XML Paper Specification
documents. Please download the latest driver by
accessing the Brother Solutions Center at
http://solutions.brother.com/
.