
User Manual

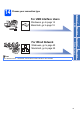
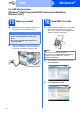
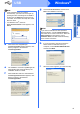

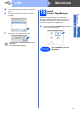
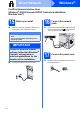
Table Of Contents
- Quick Setup Guide MFC-9120CN
- Start Here
- 1 Unpack the machine and check the components
- 2 Remove the packing material from the machine
- 3 Install the drum unit and toner cartridge assemblies
- 4 Load paper in the paper tray
- 5 Connect the power cord and telephone line
- 6 Choose a Receive Mode
- 7 Choose your language (if needed)
- 8 Set The LCD contrast (if needed)
- 9 Set the date and time
- 10 Enter personal information (station ID)
- 11 Fax Transmission Report
- 12 Set tone or pulse dialling mode
- 13 Dial Prefix
- 14 Choose your connection type
- For USB Interface Users (Windows® 2000 Professional/XP/XP Professional x64 Edition/ Windows Vista®)
- For USB Interface Users (Mac OS X 10.3.9 or greater)
- For Wired Network Interface Users (Windows® 2000 Professional/XP/XP Professional x64 Edition/ Windows Vista®)
- For Wired Network Interface Users (Mac OS X 10.3.9 or greater)
- For Network Users
- Options and Consumables
- brother CHN-ENG
- Start Here

15
Windows
®
USB
Windows
®
USB
Macintosh
d When the Presto! PageManager
License Agreement window appears, click
Yes if you agree to the Software
License Agreement.
e The installation of Presto! PageManager will
automatically start and is followed by the
installation of MFL-Pro Suite.
f When the Brother MFL-Pro Suite Software
License Agreement window appears, click
Yes if you agree to the Software
License Agreement.
g Choose Local Connection, and then click
Next. The installation continues.
h If you do not want to monitor the machine
status and error notification from your
computer, uncheck Enable Status Monitor
and then click Next.
i When this screen appears, go to the next step.
Note
• If the installation does not continue
automatically, open the main menu again by
ejecting and then reinserting the CD-ROM or
double-click the Start.exe program from the
root folder, and continue from step c to install
MFL-Pro Suite.
• For Windows Vista
®
, when the
User Account Control screen appears, click
Allow.
Note
If you want to install the PS driver (Brother’s
BR-Script Driver), choose Custom Install and
then follow the on-screen instructions. When the
Select Features screen appears, check
PS Printer Driver, and then continue following
the on-screen instructions.